May 21, 2014

The Importance of Good Photography to Sell Products Online

Last week-end as I was listing some new phone cosies in my Etsy shop, I realised how one simple change could make my photos look much better.

Take this picture of one of my latest crochet phone cosy for example:

Phone cosy photo taken straight from above

Now look at the photo below:

Phone cosy photo taken from an angle


The lighting and background are similar (as white a background I can get using Picasa photo editor while keeping the color true to the original item), the item is the same, the only difference is the angle in which the photo has been taken.

Which one do you be more tempted to buy? I know if I was a potential buyer I wouldn't stay very long looking at the first picture.

I am still wondering how did I manage to sell 3 knitted phone cosies with pictures looking similar to the first photo, and the obvious thing I need to do now is do another photography session with all my other phone cosies before too many potential customers see the bad ones!


***Follow me on Twitter and Like Sophie's Knit Stuff on Facebook for more updates***


May 13, 2014

How To Crochet A Cushion And Make An Insert Using An Upcycled T-Shirt

Once again, I am doing some crochet for our local school: the crochet class is crocheting cushions that they will sell in a fundraising event next week in the school.

It all started with a bake sale: every year now for a while, the 6th class girls organize a bake sale in order to raise money for the school (don't get me started with why we need to help our schools on top of paying our taxes; I don't want to involve politics or I would need to start a whole new blog and make a lot of enemies in the process! I still want you to think I'm a nice person:)

As the girls' crochet skills have been improving, the teacher decided that they would make 2 cushions each: one to keep and one to sell at the Bake Sale (which should be now called the Bake and Craft Sale).

The teacher had a pattern for the crochet circles, but that pattern just didn't make sense to me, as the increases were not regular and I ended up with a volcano shape when I tried to follow the exact instructions, so I followed my daughter's advice (who does not read patterns and in this case it served her right!) and crocheted 2 basic treble crochet circles.

For the crochet circles, I used 2 colours of DK acrylic yarn, and crocheted flat circle shapes, 16 rounds for each. Here are some quick instructions for the beginners:

For each circle:
Chain 4 and slip stitch in the first chain to join in a circle.
Round 1: chain 3, work 11 trebles in the circle and join with a slip stitch to the top of the first chain 3. (12 sts)
Round 2: chain 3 (counts as 1 treble), 1 treble in the same stitch, work 2 trebles in each stitch and join with a slip stitch to the top of the first chain 3 while at the same time changing colour (if you are using just 2 colours, keep both balls attached to the circle, it will save you cutting and weaving in ends when finishing). (24 sts)
Round 3: chain 3, (counts as 1 treble), 1 treble in the same stitch, * 1 treble in next stitch, 2 trebles in following stitch * repeat from * up to the last stitch, 1 treble in the last stitch, join with a slip stitch to the top of the first chain 3 while at the same time changing colour.
Round 4: chain 3, (counts as 1 treble), 1 treble in the same stitch, * 1 treble in each of the next 2 stitches, 2 trebles in following stitch * repeat from * up to the last 2 stitches, 1 treble in each of the last 2 stitches, join with a slip stitch to the top of the first chain 3 while at the same time changing colour.
For every new round, you need to space the increases (2 trebles in the one stitch) by 1: for example for round 5, there are 3 stitches with 1 treble, then 2 trebles in the next stitch....
Continue in this way until you have reached the desired size (for a medium cushion using DK yarn I had 16 rounds, but you may want yours larger or smaller).

When you have both circles finished, all you need to do is join them: place them both together with wrong sides facing and using a colour in contrast with the last round, first chain 1, then double crochet (that's Single Crochet for people in the US) in both sides together about halfway before inserting the stuffing or cushion insert, then keep joining until you have the whole circles done and bind off.
Weave in the ends, and Voila! Cushion done and ready to ship to the Bake Sale (or cuddle with).

As it's the school children who are buying the goods, the cushions have to be affordable: I spent a good few hours myself crocheting my cushion, and I would be quicker than most of the girls in the class (I am ashamed to admit that my own 12 year old is quicker than me at crochet: she just whips it up with her skinny little fingers and it comes out perfect even though she hardly even looks at a pattern!). As I was saying, a lot of time and effort is going into crocheting these cushions but sadly, we need to compete with cheap mass-produced items if we want to attract buyers for them, so even though I'm not sure of the definite price yet, they will have to be cheap if the school wants to sell them.

In order to cut down on cost, I made my first cushion insert using an old clean T-shirt and some toy stuffing. I had the stuffing in the house so that's what I used but I won't have enough for the 2 cushions my daughter is making, so I washed an old pillow and will open it up to get the stuffing out of it and into her cushions.

Because the cushions are made using treble crochet (double crochet in US terms) which tends to give gaps in a finished item, I decided to cut up an old T-shirt, making an insert from the suffing and the upcycled T-shirt.

First I used some chalk to trace the outline of the cushion on my t-shirt, and then I cut it up: it looks a bit rough because I was trying to do this quickly, I should probably have ironed the T'shirt first:


Then I started sewing it about 3 quarters before starting to insert the stuffing inside. Even though my fabric cutting skills are atrocious and the 2 circles didn't match one another very well, adding to that the fact my hand sewing skills about the same as that of a 7 year old (I don't own a sewing machine, but judging from my home economics class in school, I wouldn't have done a great job either if I had one), I managed to get a nice round shape: a bit bumpy because the stuffing was quite compact, but nothing a bit of thumping can't correct!


As you can see from the above picture, the insert is far from being perfect, but watch what happened when I put it in between my 2 crochet circles:


Not bad for a first!

I will try making another one (I hope I won't have to tear out another pillow) and I'll also have to bake a few quick treats - There will be chocolate involved, but for now, I need to go and make a new cushion insert for my daughter's cushion before she comes back from school or I'll be in trouble!

This blog entry is my submission to the Deramores Blog Awards 2014. Deramores is the UK’s number one online retailer of knitting and crochet supplies.


May 9, 2014

My Failed Knitting Project

I was excited about an extremely soft bandana style scarf I was knitting last week end using James C Brett's Pure Merino Yarn. I had 1 ball in 5 different shades, plus 2 in Royal Blue. I wanted to knit the same scarf in all 6 different colours for my Etsy shop and I decided to use the blue first in case the scarf would use more than 1 ball (it did), and quickly ordered whatever I could get my hands on from the other colours I had, before this yarn would be completely gone out of stock from most places and impossible to reorder.

Yummy Soft Pure Merino from James C. Brett

I loved how soft the 100% merino wool felt and after a few trials, I was finally happy with its shape. Then I gently handwashed my royal blue scarf, my pride and joy: it felt loose and squishy in the water, and I was really careful not to stretch the fibre while washing it, squeezed the excess water in a dry towel and left it out on a flat surface in my hot press to dry yesterday.

Soft blue bandana scarf before washing and shaping

When I checked it this morning, to my shock and horror, my previously beautiful perfectly shaped triangle bandana scarf looked a bit wider than I remembered when I had been knitting it, but the length looked similar to what it was before. It was still as soft if not more than before washing, but the scarf had gone all floppy and didn't hold its shape when I tried it on.

After washing: unwearable floppy mess
This yarn really shows off imperfections: must apply myself more!

I could nearly kick myself for not knitting a sample square and washing it before going on to knit a scarf that needs a yarn that needs to be rigid, not a yarn that has drape like this beautiful merino yarn.

I think I learned my lesson: ALWAYS knit a sample and wash it before starting a knitting project! Unfortunately, a yarn you really love may not always be suitable for a knitting project that you really want to make. For some yarns it doesn't make a difference, but it's always better to be safe than sorry, so preparation might save you from disappointment.

I still want to make this bandana scarf come to life somehow, but I will have to find a more suitable yarn from my stash (I have a bulkier one with Merino but NOT 100% merino, so hopefully this one will do).

No point crying over wasted time: I have some ripping to do and a new project to think of using my Pure Merino because I have ordered so much of it (my first order arrived today:): I'm thinking cabled tube cowl, what do you think?

***Follow me on Twitter and Like Sophie's Knit Stuff on Facebook for more updates***


May 3, 2014

Free Crochet Heart Pattern

My daughter's class is studying the heart at school, and I know that the love heart shape is not very realistic, but it's cute, so I looked for a crochet heart pattern online.

I found a few crochet heart shape patterns, but they were always too small: for some reason it seems impossible to find a crochet heart bigger than 2 or 3 inches, so I had to put my overactive brain to work, and after a few trials, I came up with this:
Big Crochet Heart
I'm sure I'm not the only person who has been looking for one of these, so here is my Big Heart crochet pattern:

Notes:
I used some pink acrylic DK yarn and a 4mm (G) crochet hook ; it would look great in cotton too, and you can use thicker/finer yarn with a bigger/smaller crochet hook for different results.

I am using UK/Ireland crochet terms so if you are more familiar with the US crochet terms, here is a list of the terms and abbreviations used in this free heart crochet pattern:
ch = Chain (same for US and UK)
sl st = Slip stitch (same for US and UK)
dc: UK Double Crochet  = US Single Crochet
tr: UK Treble Crochet  = US Double Crochet
htr: UK Half Treble Crochet = US Half Double Crochet

Important:
  •  Insert a stitch marker into your starting chain at the beginning of each row. 
  • When counting your stitches, do not count the slip stitch at the end of the rows, or the starting chain at the beginning of the rows.

Instructions (in UK crochet terms):
ch4, join with sl stitch in the 1st ch to make a ring.
Round 1: ch1, 11 dc into the ring, join with sl st to beg. ch1 (11 sts).
Round 2: ch1, dc and htr in first st, 2 tr in each of the next 4 sts, 5 tr in the next st,  2 tr in each of the next 4 sts, htr and dc in last st, join with sl st to beg ch1 (25 sts).
Round 3: ch1, 1 dc in each of the first 2 sts, 1 dc and 1 htr in next st, 1 htr and 1 tr in next st, 2 tr in each of the next 3 sts, 1 tr in each of the next 5 sts, 5 tr in the next st, 1 tr in each of the next 5 sts, 2 tr in each of the next 3 sts, 1 tr and 1 htr in next st, 1 htr and 1 dc in next st, 1 dc in each of the last 2 sts, join with sl st to beg ch1 (39 sts).
Round 4: ch1, 1 dc in each of the first 2 sts, 1 dc and 1 htr in next st, 1 htr and 1 tr in next st, 2 tr in each of the next 3 sts, 1 tr in each of the next 12 sts, 5 tr in the next st, 1 tr in each of the next 12 sts, 2 tr in each of the next 3 sts, 1 tr and 1 htr in next st, 1 htr and 1 dc in next st, 1 dc in each of the last 2 sts, join with sl st to beg ch1 (53 sts).
Round 5: ch1, 1 dc in each of the first 2 sts, 1 htr in next st, 1 tr in each of the next 2 sts, 2 tr in each of the next 3 sts, 1 tr in each of the next 18 sts, 5 tr in next st, 1 tr in each of the next 18 sts, 2 tr in each of the next 3 sts, 1 tr in each of the next 2 sts, 1 htr in next st, 1 dc in each of the last 2 sts, join with sl st to beg ch1 (63 sts).
Row 6: 1 sl st in first st, 1 dc in each of the next 2 sts, 1 htr in next st, 1 tr in each of the next 3 sts, 2 tr in each of the next 3 sts, 1 tr in each of the next 21 sts, 5 tr in next st, 1 tr in each of the next 21 sts, 2 tr in each of the next 3 sts, 1 tr in each of the next 3 sts, 1 htr in next st, 1 dc in each of the next 2 sts, 1 sl st in last st, join with sl st to the back loop of the first sl st (73 sts).

Here is the link to the free Ravelry PDF download: Big Heart Crochet Pattern.

If you share this big heart shape crochet pattern, please include a link to my blog or my Ravelry Designer page!

***Follow me on Twitter and Like Sophie's Knit Stuff on Facebook for more updates***


Apr 29, 2014

Quick and Colourful Improvised Crochet Top

I am very impressed with how quickly I finished this super easy crochet top for my daughter: I started it on Saturday night, did a few hours on Sunday and Monday (not all day, as I was busy shopping, having to get my car's alternator fixed and cutting my lawn), and put it all together today.


This top was made for a child size 10 years and the colourful stripes (her choice) are each made of 2 rows of treble crochet (that's double crochet to US readers). I used some acrylic DK yarn: a bit less than half a 100g ball of each of the 3 colours so it was also cheap to make.

Being acrylic, it's not a top she'll be wearing on hot summer days, but we live in Ireland so that's fine. I would have used cotton yarn for a real summery top, but being broke, I did with what I had in the house.

I didn't waste time looking for a pattern. My daughter was wearing a cute top at the time with a simple shape: a front and a back piece with short sleeves as extensions of the top's shape, so I used that top as a template.

My daughter being the one who chose the colours and told me she wanted the same shape as the top she was wearing a the time, she also requested that I do 2 rows of treble crochet per stripe (first she asked me what was quicker and that was the quickest stitch I could use in making a crochet top so I think  she was just in a hurry to have it), and she demanded that I start with the pink stripe, then the white, then the yellow, I might as well say this top was designed by her (I'm just the maker).

I finished by adding a pink border made from 1 row of double crochet (Single crochet for our US friends) all around the neckline after sewing the top together). I was going to do the same for the sleeve edges, but it looked good enough without, and I was afraid this would make the sleeves too tight (not that my 9 year old has huge biceps, but I want her to have freedom of movement for those star jumps and cartwheels!)

With all the stripes, the yarn ends were a bit of a pain to sew in, but not a major issue.

And that's how you crochet a piece of clothing like a Boss!

***Follow me on Twitter and Like Sophie's Knit Stuff on Facebook for more updates***

Apr 26, 2014

Crochet Projects For The Family


This week I decided to use some of my yarn stash and practise my crochet skills to make myself a summer top: I am using some grey Sublime Tussah Silk DK for the bottom part and I have just finished the waist band in dark green Filati Da Collezione Star: it has got glittery silver in it, and I think it goes well with the shiny silk from the gray yarn:


I am also starting a top for my youngest daughter. The three of us were shopping for clothes on Wednesday and the eldest always gets more: I bought her little sister a cheap pair of jeans but most of her clothes get passed down to her from her big sister, so she can feel a bit left out sometimes.

So this afternoon I let her pick some of the DK acrylic yarn previously bought from Aldi, if I had had some bright cotton I would have used it but as we live in Ireland and summer never gets hot and doesn't last more than a fortnight (and that's if we're lucky!), acrylic will do. It will be also perfect in the autumn over a plain long sleeve T-shirt.

So she decided on fushia pink, white and yellow for her top. She may be only 9 but she knows what she wants and judging by some of the drawings she's been doing, she has an eye for fashion! She requested that I do it in treble crochet (that's double crochet if you're in the US): 2 rows of each colour between changes to be exact. It is going to have the same shape as the top she is currently wearing today, which I am going to have to steal tonight when she changes into her pyjamas in order to measure it properly (it's not easy to measure a slightly hyper happy child who likes to jump up and down all the time!).

I made the swatch as requested by her and measured the bottom part of her top just so I can make a start on it. It will be bright and wonderfully colourful, just like Emilie's happy personality:


I will now leave you with some crafty bits that Emilie wanted me to share on my blog: about 80 chain crochet bracelets, necklaces and rings made by herself using her own stash (yes I know!) and some of my leftover bits of yarn:


***Follow me on Twitter and Like Sophie's Knit Stuff on Facebook for more updates***

Apr 18, 2014

DIY Dummy Put To Some Good Use: Alpaca Lace Hearts Shawl And Knitting Pattern

Today is the day when I unveil my finished DIY dummy bust shape.

After I finished stuffing and covering Barbie twice with papier mache, I painted it all over with white poster paint. I used 2 coats but she could really have used 3.

I was very lucky with the nice sunny weather here at the beginning of the week, so I did all this outside, where I managed to dry the 2 coats of paint in one afternoon, while worriedly watching and hoping the wind wouldn't blow her out on the uncut grass.

After I brought the dummy home, I noticed the paint was looking a bit cracked, so I covered it with a thick coat of craft glue in order to seal everything in place.

So now I have one bumpy dummy bust, which I dressed using one of my summer tops, to hide all the bumps and not too even white colour.
It's not perfect but it will do for what I need: something that is not me to help me display knitted scarves, wraps, shawls...
It was a lot of time-consuming work, and I resent it a little for all the time I spent making it, dirtying my kitchen, and not letting me knit as much as I would have liked. 

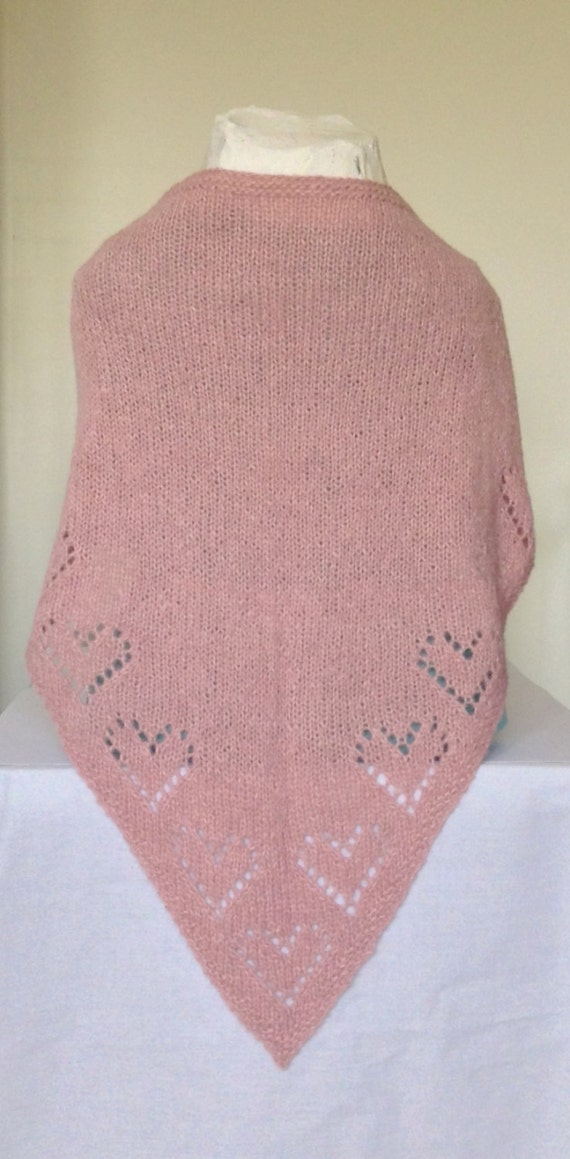
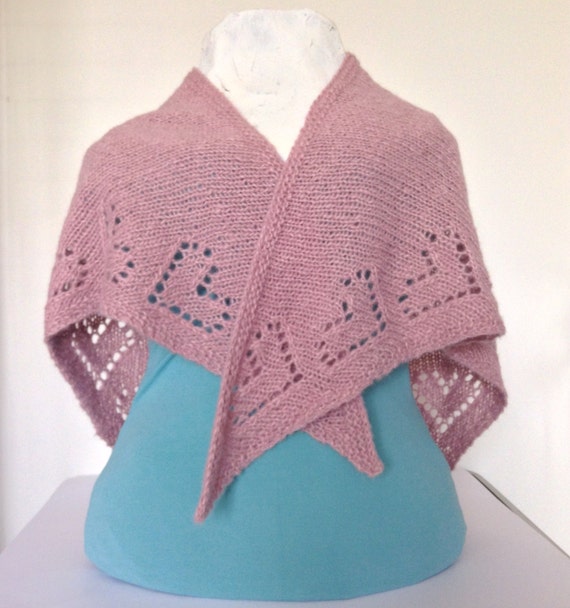
In the end, I am glad I have my display dummy now, and I have already put it to work to display my latest knit of art: the Alpaca Lace Hearts Shawl:

This shawl is available to buy now from my Etsy shop Sophie's Knit Stuff.


During all this week, I have also worked very hard on the shawl pattern, and I am proud to announce, that after even more time drawing charts on my computer, typing the corresponding instructions making sure there were no mistakes, translating the same instructions in French, and an awful lot of proofreading, the knitting pattern for my Alpaca Lace Hearts Shawl is now also available to buy from Etsy, Ravelry and Craftsy.


I am going to have a cup of coffee now, before I replenish my food supply and clean the house, and then hopefully I will be able to enjoy a nice long Easter week-end.

Happy Easter!

***Follow me on Twitter and Like Sophie's Knit Stuff on Facebook for more updates***

Apr 13, 2014

Making A DIY Bust Shape: How To Build A Dummy Body Using Chicken Wire

For a while I've wanted to get a dummy body to display the scarves I knit but unfortunately, living on the Island of Ireland leaves me with 2 choices: paying astronomic shipping rates to get a large item delivered to me, or making one myself.

There are a few YouTube videos that show you how to make a dress form: you can get someone to cover you with duct tape, get that someone to cut you out of the shape made, close it up with more tape and fill it with stuffing, newspapers, expanding foam...

Being the only adult in my house (I'm not sure I should trust a 12 year old to have the patience to do all that work: she might give it up, leaving me half stuck for a few hours, and the cutting bit might be a bit tricky - I don't want blood on my dummy!), I decided to use another DIY method to build my dummy body: of course it had to be the hardest and slowest one!

First I got a small roll of small gauge chicken wire in a local shop: you can get some in most hardware stores, you don't need a very large quantity, a 100cm length is enough for an average size bust.

Then I put on my gardening gloves and tried shaping my roll into something that looked like a female body shape:

You really need gardening gloves for this, as chicken wire has sharp bits and if you're a knitter or a crocheter, you need to protect your hands! You might want to cover your kitchen table with newspapers before you start, I left my cheap tablecloth on to protect the table from scratches and the tablecloth is still a bit grey.

Shaping is a bit tricky: you need to pull the holes in the wire slightly apart for wider areas (chest, shoulders and hips), and push them tighter for skinny areas (neck and waist).
I call her Barbie: she's not made out of barbed wire, but her waist is Barbie-like skinny. Hopefully I'll manage to fatten her up a bit, but as she'll only be used for scarves, she doesn't need to look too realistic (she has a bigger chest and tinier waist than me, but the height and shoulder to shoulder width are about right).


Now comes the messy bit: that wire is pretty sharp and not that pretty at the same time, so I decided to cover my dummy body with papier mache.

I started tearing up strips of newspaper in front of my kids hoping they would want to finish the pile and it worked!

Then I got my 12 year old to show me the papier mache mix she had used in school for her art classes: I thought it would be more complicated but it's only a pancake consistency mix of flour and water (messy, but easy enough to clean afterwards).

While my youngest was out playing with a friend (being a bit of a mess hater, I was a bit relieved that she was not around), I enrolled my 12 year old to help me cover the dummy shape with papier mache: it took us about 1 hour before the shape was all covered but it needed more layers so I let the first coat dry outside for the rest of the afternoon.

At that stage I had papier mache over the neck opening but not the bottom opening, which was a good thing because one of my very wise Facebook likers advised me to stuff it with newspapers to avoid it becoming "wonky".

The next morning I turned the bust over using my clean recyling bin: I used clean papers and cardboard found in the said recycling bin, as well as lots of old brochures and magazine pages to stuff the body, because I didn't want to run out of newspaper. Now is the time for me to confess to very rarely buying a newspaper, but I take all the local free newspapers I can get!

After stuffing it, I covered the bottom part of my dummy form with papier mache (still turned up neck down in my recycling bin).


Then after lunch, I added some white craft glue to the mix and added a layer to the front, while at the same time trying to fix some gaps and bumps, before letting it dry on the sunny patch in my kitchen.

I'll be doing the same with the back later on, and I will be painting it when I can rely on the weather to be dry and not as windy as it is today because I'm not cleaning paint stains off my kitchen floor. It needs to be sealed with some kind of paint or varnish (I will be using matte paint I had bought for another DIY project that did not happen and I don't want a shiny dummy when taking my scarf pictures), because I am afraid the smell of pancake batter would attract mice into my house in winter: it will need a thick coat of paint!

If you want to do this in your own kitchen, set aside 2 full days of no serious cooking because this will take over your kitchen as well as your time. I think using a hair dryer on a low setting would help it dry more quickly but I decided to let it air-dry, as I have plenty more things to do in between papier mache layers (I just hope my kids don't step in the papier mache mix bucket or on my dummy while I'm upstairs typing this!).

I'm not sure when I can post a picture of the finished dummy (or list the shawl I finished making, since I'll need this dummy to be finished and completely dry before then!), but when it is, I will let you all know!

***Follow me on Twitter and Like Sophie's Knit Stuff on Facebook for more updates***


Apr 7, 2014

Free Crochet Easter Egg Pattern For Beginners

Last Friday while at school for the weekly crochet session where I try helping out (I say try because sometimes there's more giggles than actual crocheting:-), the teacher was looking for ideas of something simple the kids could work on during the week.

Because it's nearly Easter the obvious and easiest thing I could think of was a crocheted Easter Egg so I said I would try and come up with an easy Easter Egg crochet pattern.

Some of the girls in the class are still struggling with their crochet (I guess I'm not that much help then!), so I could have designed an egg to work in the round, but I thought it might be easier to work 2 flat pieces and sew them both together after stuffing them with cotton wool or other stuffing material.

I did my homework and came up with this:

Crochet Easter Eggs

I made the turquoise egg on Friday, typed the pattern on Saturday and my daughter tested the pattern by making the red and pink eggs on Sunday morning: she found them so quick and easy she made one more last evening and cast on a 4th one this morning, to work on in her spare time in school.

I also made a crochet basket to put all our eggs in, but I finished it last night and my daughter took it to school this morning before I got the chance to take a picture:-(

Since I am sharing the pattern with the school, I thought I might also share it with my blog readers.

If you are a beginner the instructions are very easy to follow because I tried making sure it would be easy for 12 year-olds (the average class age), there is even a chart included to make it even easier: my daughter can vouch for it!

You can download the PDF for free from my Ravelry store. Here is the direct link: Easy Crochet Easter Egg for Beginners.

I apologise to my French countrymen and countrywomen as the pattern is in English only because I am not familiar with French crochet terms (I learned crochet recently and have been living in Ireland for about 20 years), but the chart should make it easy enough to understand as long as you know how to increase and decrease in double crochet.

***Follow me on Twitter and Like Sophie's Knit Stuff on Facebook for more updates***


Apr 3, 2014

Lace Alpaca Hoodie Cowl Knitting Pattern

For the last 2 weeks I have struggled writing the knitting pattern for the Lace Alpaca Hoodie Cowl I designed last November, and knitting a new one from scratch following my own instructions:

The main reason why I struggled so much was because I waited so bloody long between knitting it last November while scribbling some half French half English notes on a notepad, and realizing while knitting the Hoodie Cowl now that I must have skipped some steps, because I had to do some heavy editing to the pattern I thought I had got right (the shame!)

Lace Alpaca Hoodie Cowl
Anyway, now the knitting pattern is available to buy from my Ravelry Shop as well as Etsy, and it's in French as well as in English (purchasers will receive 2 PDF files: one in each language).

I try not to price knitting patterns too high, but after publishing my last one, I realised that after the Paypal and the Etsy fees, there isn't much left to go in my pocket, so hopefully I will sell a few of those despite the fact that spring is already here and that knitters may be looking for more summery knitting patterns for the next few months; well, the pattern is there to stay, and I will just have to remember to promote it again in the Autumn!

To buy my Lace Alpaca Hoodie Cowl from my Ravelry shop, please click here.

To buy it from my Etsy shop, please click here.

***Follow me on Twitter and Like Sophie's Knit Stuff on Facebook for more updates***

Mar 21, 2014

Crochet and Knit Hats For Heroes

A while ago I came across a Facebook Group called Hats for Heroes that was asking people to crochet hats for children in Ireland affected by cancer.

At the time I wasn't very experienced in crochet but I was and I still am learning, so I thought I would give it a go, since I would be doing something I enjoyed for a good cause.

I contacted the people at Hats for Heroes to ask if the hats could be knitted and the answer was yes, but I still wanted to try crocheting some, so I looked for a nice pattern online and I found this lovely Tweetheart Hat crochet pattern which gives intructions for all sizes from newborn to adults.

Of course, as usual, I used a different wool from the one in the pattern, but I wasn't doing a specific size so I could experiment with different yarns, as long as it was soft (scratchy isn't an option when you've lost your hair after chemotherapy).

Here is my first Tweetheart hat made with soft Aran (worsted) yarn following the size for child: it is smaller than I expected but will fit a baby (maybe 3 or 6 months old), I'm not sure of the exact age since I don't have babies lining up to try on the hats:

Baby Tweetheart Crochet Hat


Then I used similar weight yarn and followed the adult size and I got a hat suitable for a child: I thought it would look prettier without the ear-flaps and I added a frilly picot edge and flower:

Child Flower Crochet Hat with Frilly Picot Edge

Then I thought it was time to make something less girly so I went out and bought some chunky navy and blue yarn to make a teen sized beanie hat, following the instructions for child size because the yarn was pretty thick:

Teen Crochet Hat with Navy and Blue Stripes

Since I had leftover yarn, I decided to knit a hat this time, casting on as many as I thought I would need for a child's hat and using a pattern I already had, but modifying it slightly it as I went:

Child Knitted Pompom Beanie Hat

Guess what? This one will fit a toddler or small child, just as I intended! The pompom was added as a result of feedback on my Facebook page (I think I was going to add it anyway;-)

As soon as all 4 hats are finished drying (I like to wash them in gentle shampoo or wool friendly detergent before shipping any knit or crochet clothing item I make), they will be off in the post on their way to Hats for Heroes who will forward them to Irish Hospitals where they will be given to children with cancer. I hope these hats will cheer the children up!

As much as I've enjoyed knitting and crocheting hats and daffodils for charity, I must really get a move on and work a lot harder on knitting new items and publishing new knitting patterns for my Etsy shop, which is slowly depleting itself as my Christmas items are coming to the end of their 4 months listing (the maximum before I have to pay commission to get them re-listed) and I am not planning on re-listing those until next October.

So off I go and pick up my knitting needles (after I've had my lunch of course, I need to eat yummy food and drink coffee to keep my creative brain cells active!)


***Follow me on Twitter and Like Sophie's Knit Stuff on Facebook for more updates***

Mar 17, 2014

St Patrick's Day Crochet Scarf


My daughter's class is learning how to make crochet granny squares in school and I've been roped in to help once a week, so since we were so close to St Patrick's Day, I decided to make a granny square using the Irish colours: green, white and orange:

St Patrick's Day granny square

I wasn't sure what to do with it, so I made 5 more like this and 6 using the same colors, reversing them (orange in the middle and green at the outer edge) and then I joined my 12 granny squares to make an Irish St Patrick's Day scarf:

St Patrick's Day scarf

Since I have to stand outside in the cold watching my 2 daughters playing with their school band in our local St Patrick's Day parade, I might as well be warm doing it!

And in case I'm not brave enough to wear the St Patrick's Day scarf outside, I'll always have my crochet shamrock pin:

Crochet Shamrock pin
 

Happy St Patrick's Day!


***Follow me on Twitter and Like Sophie's Knit Stuff on Facebook for more updates***

Mar 13, 2014

Blue Cabled Cardigan Finished!

I am very happy to say that between the time I finished knitting all the pieces of my blue cabled cardigan and the time I sewed all the pieces together, no more than 2 or 3 weeks have passed, with an extra week to wash and dry it and deciding my cardigan needed some buttons.

The knitting pattern did not provide for buttons but mentioned that a shawl pin can be added if the cardigan was to be worn closed, so I knitted as per the instructions, without any buttonholes.

Last night I tried making a flower pin using a large safety pin to keep my cardigan closed but I wasn't happy with it, so this morning I added a crochet button band on one edge and 4 nice wooden buttons on the other side. The cardigan was then ready to be worn in public after roughly 2 months of starting it (please don't judge my awkward posture, I just don't know how to stand without looking weird):

Front

Back

 Now I must get on with my St Patrick's day scarf which I'm not sure I will dare wear in public: I might just hang it in the house as a decoration, but that's something I won't share here until Paddy's Day.


***Follow me on Twitter and Like Sophie's Knit Stuff on Facebook for more updates***


Mar 7, 2014

My Daughter's Giant Granny Square

For the last few weeks my daughter's class has been learning crochet and even though my daughter already had basic crochet skills before starting, she had never made a granny square.

The lesson last Friday was granny squares, and it seems a certain 12 year old in our house is getting addicted to granny squares. Here is what she has been making since last Friday:

Ganny Square Blanket by my daughter

 She has got me to drive all the way to Knitwits and Crafty Stitchers on Monday to get her 2 new balls of each color (she's using King Cole's brightest dolly mix colors). I'm not sure how big she wants this blanket to be but I have a feeling she doesn't want to stop and will soon start yarn bombing our house!

I had never made a granny square before either so she made me try one and here's my first attempt:
My first (wonky) granny square
I know it's a bit wonky and I must admit there is now a bit of healthy competition between both of us (she won this round), but this was at the end of a long day and I was rushing to make this granny square before bedtime.

Granny squares are a lot simpler than they look and I can understand how one would get addicted to making granny square blankets.

That's it for today, I have a lot more knitting and crochet things to share but these are going to have to wait as my afternoon will be taken over by a certain 12 year-old birthday party.

***Follow me on Twitter and Like Sophie's Knit Stuff on Facebook for more updates***

Mar 2, 2014

Knitted Daffodils for Irish Cancer Society

Each year in Ireland, daffodils are sold in every street corner to help raise money for Irish Cancer Society.

This year I found this blog post on Michelle Made This where you can find instructions on how to knit daffodils and the details on how to forward them to Irish Cancer Society so that they can be sold to help them raise money for their organisation.

So far I have knitted 11 daffodils, and I plan to make some more in the next two weeks which I will bring to the coffee morning in Roscommon on March 14th, unless I can find somewhere closer. I haven't contacted them yet (I have a bit of a phone phobia, and try avoiding making phone calls whenever possible, unless it's for a job that pays me to use the phone or a medical emergency). For more more information on any local events you can contact Irish Cancer Society on 1850 60 60 60.

Here's what I made so far:

Knitted Daffodils for Irish Cancer Society

I used the knitted pattern which can be downloaded for free here with a few changes in order to avoid bits of fiddly sewing:
  • To make the trumpet, instead of casting off after the last row of petals where you get 7 stitches, I knit one row with one increase in each stitch: kfb (knit front and back of each stitch), which gives me 14 stitches. I can then knit the 4 rows of the trumpet and cast off before closing the daffodil, which does involve minimal sewing.
  • In order to make the stem, I turn the closed daffodil on its back and pick up 5 stitches, trying to get them from around the middle, and evenly spaced to try and include one from each petal, then I use the i-cord method to knit the stem using green yarn - you can do this using 2 double pointed needles or 1 circular needle: once you have knit the first row, slide the stitches to the other side of the needle and knit the new row; you will need to knit the first stitch of each rows quite tight to avoid a gap and after a few rows you will start seeing a small tube shape. When you get to the length you want (I knit until I have an 8cm long stem), no need to cast off, just cut the yarn leaving a 8 cm tail, insert the yarn tail in a tapestry needle and thread through all 5 stitches starting from the stitch furthest to your yarn and make a knot to secure. Hide the tail inside the stem (I try bringing it up all the way to the top of the stem to make the stem a bit stronger).
  • Add a safety pin. I'm afraid my safety pin doesn't look as neat as I would like it too, but this will not show once the daffodil is worn:
Back of knitted daffodil
The daffodils may look a bit complicated for beginners but they are actually very easy and I find them almost addictive to knit.

I'll get back to knitting some more next week, as I am busy crocheting a few bits which I can't share yet for my daughter's birthday party (which is coming closer than I thought since I realised there were only 28 days in February!) and I also need to sew the blue cabled cardigan I finished last week and gave myself today's deadline to do (5 pieces of knitted cardigan pieces aren't doing anyone any good when they're left in a shopping bag!).

***Follow me on Twitter and Like Sophie's Knit Stuff on Facebook for more updates***

Feb 25, 2014

Blue Knitted Cabled Cardigan Nearly Finished

Back in January, I started knitting the "Chocolate Passion Cabled Jacket" from a free knitting pattern I found on Ravelry. Well, I can't really call mine "Chocolate", as it's blue.

I'm very happy to say I got all the pieces finished since yesterday. I did encounter a few problems along the way, why is bound to happen when you read the instructions too quickly and if you haven't knitted a full garment like this for a while.

The back piece had to be ripped partly and re-knitted twice but overall, I am glad I spent no more than 6 weeks doing all of the pieces. It would have taken less time if I hadn't been doing other projects between each piece, but knitting and crocheting small things in between helped me not getting bored with it.

Here's a picture of all 5 pieces on my kitchen table:
Knitted blue cardigan before assembling
Yes I know, it doesn't look like a cardigan yet, and the most difficult part is yet to be done: the dreaded sewing all the pieces together without making it bunch or having the tell-tale sewing lines showing on the outside!

I am hoping to get it all together before next week, but first I must procrastinate by knitting lots of little daffodils and crocheting children's hats for charity!

***Follow me on Twitter and Like Sophie's Knit Stuff on Facebook for more updates***

Feb 19, 2014

Who Said Crochet Was Faster Than Knitting?

I think I have to disagree with what I'm hearing from most people, including my own daughter, who I now call "The crochet Ninja". I wouldn't mind being called a Knitting Ninja, if there was such a thing, and if I knitted fast enough to earn me that title.

More and more knitting and crochet projects are being added to my list of things to craft, and while I struggle to try and add more hand knit items to my Etsy store, most of the things I'm adding to my list are things I won't get paid for.

At the moment that list is in my mind, and hopefully one day before the middle of next month I'll have most of these done:
- Knit some daffodils for Irish Cancer Society (deadline mid-March)
- Crochet/knit some hats for Hats for Heroes for children with cancer, (no particular deadline but not to be put on the long finger as I usually do),
- Knit a Katniss Cowl for my daughter's birthday (deadline 11th March),
- Crochet treat bags for same daughter's birthday (deadline 11th March),
- Knit/Crochet some green headbands and Shamrock badges for St Patrick's Day (deadline fast approaching)
- Finish knitting my cardigan for which I have now finished the sleeves and realized I have to rip the top half of the back a second time, as my re-knitting wasn't following the right chart (there's always next winter!)
- *Finish crocheting the hat I started for my daughter:

2 evenings of crocheting a hat (Who said crochet was faster than knitting?)


* She doesn't need a new hat, but as she was hovering me while I was looking for crochet patterns on Ravelry, she saw the TweetHeart pattern I found and ordered me to make one for her, which I thought may be good practice for the charity hats I plan on making.

When I have all of the above done, I will still have to write and publish a few knitting patterns and hopefully I'll have time to think of new lovely knitted (and maybe crochet too;-) things to add to my Etsy shop.

In an ideal world, I would manage to finish most of these things on time, but unfortunately we don't live in that ideal world and I'm spending far too much time on Facebook, which is probably the main reason why the hat I started crocheting 3 days ago is far from being finished, and given the fact that I have to head into town, I don't think I'll be finishing it today either, unless I magically transform into a Crochet Ninja.

***Follow me on Twitter and Like Sophie's Knit Stuff on Facebook for more updates***


Feb 6, 2014

Progress On My Blue Cabled Cardigan

Last month I started knitting the Chocolate Passion Cabled Jacket from a pattern I found on Ravelry and last time I wrote about it I had only knitted the bottom half of the back.

I have now progressed to nearly finishing the second front piece. It's a very unusual shape and due to my own stupidity I have had to rip parts of the first front as I was reading the instructions the wrong way. I won't blame the pattern writer, just my own little twisted mind that would not listen to logic.

I had the back finished (or so I thought!) and was knitting the first front piece when I realized that I had messed up with the back's underarms bind offs: I worked the underarms as if they were shaping decreases so I will have to rip about half of that piece, but I wanted to have both front pieces of the cardigan done before redoing the back, because the first side being still fresh in my mind, I thought it would be silly to work on the back before doing the second side.

To give you an idea of how it will look I took a selfie this morning, with the right side of the cardigan:
Right side of Blue Cabled Cardigan
I know it doesn't look like much right now, especially with the red lifeline still in it (that also acts as a row marker to make it easier to measure), but I'm hoping it will all come nicely together when finished.

It's not progressing very fast, as I am also working on a few things for my daughter's birthday coming up in March, which I hope will give me ideas for new knitty and crochetty stuff to add to my Etsy shop, and I'm also working on a bunch of knitted headbands too, while trying to find the time to finish my double knitting online class.

***Follow me on Twitter and Like Sophie's Knit Stuff on Facebook for more updates***


Jan 31, 2014

Knitting And Crochet Books From The Library

Thanks to the Internet there are a lot of free resources online for knitting and crochet addicts like me who always want to learn more. From YouTube tutorials to free knitting patterns, as long as you have a working Internet connection, nothing can stop a knitter who owns yarn, however, sometimes it's nice to unplug and learn a new skill without having to glue your eyes to a computer or smartphone screen.

Being on a limited budget I don't buy many knitting books, but I know of a place I can always get a good reference book for little or no money: my local library's fee is €5 for one year, and my children can borrow books there for free as long as I am a member, so I have a good reason not to spend a lot of money while still reading books.

I used to borrow only novels, until I discovered the reference books aisle of my library, and this is what I came home with 3 weeks ago (and sadly have to return, but I will renew one of them for an extra 3 weeks because I hardly got the chance to open it):

The Encyclopedia of Crochet Techniques - Jan Eaton

100 Flowers to Knit & Crochet - Lesley Stanfield

Crochet to Go! - Ellen Gormley
 I bet the librarian thinks I'm a little mad!

If you are planning on buying knitting, crochet, or reference books for any other hobby you may have, but don't know which ones are the best for you, just have a look in your local library, there might be a book you've wanted to buy that turns up not to be that useful and would have wasted money on if you had bought it, or you might find a book you can't live (or knit) without and decide to buy it, like I did with my Knitter's Bible:

The Knitter's Bible - Claire Crompton

***Follow me on Twitter and Like Sophie's Knit Stuff on Facebook for more updates***

Jan 26, 2014

Crochet Flowers to Light Up A Stormy Sunday

These Crochet flowers were made by my 11 and 3/4 old daughter. I hadn't realized she had made that many, but when I saw them in her crochet hooks case this morning, I took them out to have a better look and I just had to take this picture:

Crochet flowers made by my 11 and 3/4 year old

I'm a little jealous of her ability to learn crochet so fast: while it takes me hours to search for an idea of what to crochet, another hour to select the one I want, adding an unknown amount of time to learn, rip, try again and again until I'm happy with the result, this kid just asks me how I'm doing a crochet flower, listens to me starting to explain and stops me after 5 seconds telling me she got it, then she picks up a crochet hook and some wool and just goes ahead and has 8 of these crochet flowers done!


While I'm adding an 11 year-old brain to my Christmas wish list, I will leave you with a picture of a crochet flower I made, after a long day of learning, ripping, re-doing.... I hope this will cheer up your Sunday, as today this little Irish country is being battered once again by wind and rain, and the only thing there is to do is knit or crochet sitting by the fire:-)

Crochet flower made by me
***Follow me on Twitter and Like Sophie's Knit Stuff on Facebook for more updates***


Jan 19, 2014

Knitting My Blue "Chocolate Passion" Cabled Cardigan

I've been hesitant about knitting large projects because of how time consuming they are, but rather than heading to Penneys and buy some cheap "I hope I won't look like everyone else around here" piece of junk, I've finally decided to start knitting a nice cardigan for myself.

A while ago, I bookmarked a free knitting cardigan pattern in Ravelry with nice cables that I really liked and I happened to have a blue yarn in my stash, not the one specified in the pattern, but a similar weight yarn for which I managed to get the same gauge.

The pattern is called Chocolate Passion jacket with cables but of course, since the wool I'm using is blue, I can't call it that.

January isn't the best time to cast on a winter cardigan pattern, especially since I'm still at the same time learning how to crochet, trying to stock up my Etsy shop with more knitted headbands and studying my double-knitting online course, but since I live in Ireland where the weather can be unpredictable, I guess I'll still be able to wear it in May or June, in between 2 mini heatwaves. And if my knitting is too slow, there's still next winter (a full 11 months and 3 weeks' long one, ha ha!).

It's a funny knitting pattern for a cardigan, as it begins with the back, but at about a quarter high, and the lower back piece is knitted with the fronts, (I guess I'll have to do some sewing afterwards to join them all together, sigh!).

The cardigan has lots of lovely cables and the picture of the finished knitted cabled jacket looks amazing: I hope mine will look beautiful too. If it turns out the way it's supposed to, I'll be wearing it a lot to show off my cable knitting skills!

Here's what I have knitted so far:
Middle back of my blue "chocolate passion" cable cardigan
I'll try and keep sharing my progress here, in between crochet and double-knitting bits and bobs and hopefully some of the ideas that keep popping up in my head - I think I'm suffering from knitting ADHD, wanting to do it all at the same time:-)

***Follow me on Twitter and Like Sophie's Knit Stuff on Facebook for more updates***


Jan 12, 2014

First Double Knitting Homework: Double Knit Duvino Headband

I already mentioned that I am following a double knitting class from Craftsy. There are some very nice projects to make in the class and during the week I've been doing the first class project: a double knit, reversible headband.

I already dabbled a bit in double knitting when I was doing my Christmas double-knit coasters, but taking this class gave me better tips on how to cast on and bind off in a neater way, and also how to have cleaner edges (in the case of flat double-knitting), and I'm still only at the end of lesson 4 out of 10, so I'm hoping to learn a bit more from it.

One thing you need for double-knitting is A LOT of patience. This is a very slow process that requires focus so not something to do while watching a movie (better switch to an easier project!). I haven't been able to knit more than 4 or 5 rows a day (each row has 3 repeats of the pattern and a total of 111 stitches) because I would have been on the verge of losing my mind. Even though I love the effect achieved by double knitting, this is not a knitting technique I would recommend for big projects.

So here we go, I present you the Duvino Headband, designed by Alasdair Post-Quinn and knit by my own ten nimble fingers:

Now I'm going to knit something simple before I get back on the double knitting horse because my brain needs to rest a little, but then again, I might just decide to get on with the next lesson tomorrow!

***Follow me on Twitter and Like Sophie's Knit Stuff on Facebook for more updates***