Oct 27, 2014

Knitty And Crochetty Halloween

Have you ever had any knitting cravings (and before you ask, no I'm not pregnant!)?

Yesterday I was taken by an urge to knit one of these cute Halloween Pumpkins (free knitting and crochet pattern available from Hannah Maier on Ravelry):


I'll be visiting my sister for the Halloween week-end so I thought I would make one for her so she can have one piece of Halloween decor for her flat.

I also had to make one for our own house, this one will probably look a bit out of place among our tacky Halloween decorations (I'm too lazy to decorate so I more or less gave my kids a free hand for our Halloween decor, I had to stop them before having the walls covered in fake blood - creative kids can be a curse sometimes!)

I knitted both pumpkins using the same pattern and wool but using a different needle size (3.75 mm for the big one and 3.00 mm for the small one), which explains the difference in sizes.

My eldest wants to dress up as a black cat this year so she asked me to crochet her a cat ears hairband for which she found a free pattern online from Stitch11. Of course doing this in black means my eyesight has been blurry since (should be better by the time I have to drive to Dublin). She started making herself a cat tail without a pattern which I had to finish for her as she has crafty ADHD too.


The plan this year is to leave the Trick or Trick responsibility to their Dad and his girlfriend (I'm no good at doing fun stuff) while my sister and I head to the Knitting and Stitching Show (yes it's that time of year again:)

Hopefully the little one doesn't decide that she needs a full Halloween outfit crocheted for her 5 minutes before going to Dublin!

Happy Halloween!

***Follow me on Twitter and Like Sophie's Knit Stuff on Facebook for more updates***


Oct 22, 2014

Toys!

I present you my new toy:


I've been toying with the idea of getting a sewing machine for a long time: it all started when my daughters started school and the hems of their expensive school uniforms systematically came off. I know there are iron-on hem strips available on the market, and believe me I've tried using them but they seem to only last a few washes or maybe I've been doing it wrong; I've never been a fan of ironing anyway!

Then last year my youngest daughter was taught the basics of hand sewing in school, and she seemed very interested in it, she even bought herself some fabrics squares to practice at home!

Last summer when we went to stay with my parents for an annual French holiday, my Dad let her try her hand at his sewing machine - funny how I never even thought of asking him if I could try it as a child. I guess I was happy enough back then with my knitting skills and the outfits my Dad used to make in his spare time for my mum and my sister (I was too much of a tom boy to want pretty dresses) did seem very complicated to me: all that measuring, cutting and ironing before he even got to open the sewing machine... I must say my Dad is a perfectionist in everything he does, and whether it's DIY or sewing, once a job is done, it's solid and lasts longer than if it had been professionally made!

So when I talk about my new toy, it's more OUR new toy, as I (jokingly) told both my daughters that I wouldn't be be buying any more clothes and that from now on, we'll all be making our own.

Joking aside, I'm not ready to make clothes yet, if ever, but there's an oven glove I've been meaning to replace and I remember making one back in school for my "Travaux Manuels" class - I guess the equivalent of Home Economics in Ireland - I don't think I was ready for sewing machines back then as my oven glove looked nothing like one, so hopefully the next will be better.

I would also like to try making some nice phone cosies, small bags, pencil cases... Nothing too complicated or time consuming as there's still a lot of knitting and crochet to be done.

Talking about knitting and crochet, here are a few things I've made (I should have shared these sooner but I kept on forgetting to take pictures):

First is a crochet Christmas elf made using the pattern and yarn from Let's Get Crafting Knitting and Crochet, issue 64. Sadly the pattern hasn't been uploaded to their website but there are nice free patterns available from them here:


Then 2 knitted teddies I made for my 2 daughters that still need a nose (the teddies, not my daughters;), pattern for the Huggable Teddy Bear among other amazing toy patterns so lovely that it's a real struggle to choose from, available to buy from the more than talented Huggable Bears designer:


I hope my daughters and I will have more time to play with our new toy next week, as it's the Halloween break, and I've planned to go to the Knitting and Stitching show next week-end in Dublin; with my new sewing hobby, I hope my purse will behave itself this time!

***Follow me on Twitter and Like Sophie's Knit Stuff on Facebook for more updates***

Oct 4, 2014

A Bunch Of Crochet Beanie Hats

I've decided to try and knit or crochet at least 2 winter accessories per week between now and the end of November.

Crochet beanie hats are the quickest and apart from the 2 hats I've crocheted for myself and my daughter, here's one that I made earlier (sounds like a cooking show, doesn't it?):
Brown-Orangey beanie hat, plain and sweet for a casual everyday look

I used the Cade Cap crochet pattern from The Velvet Acorn to make a funky hipster hat for my daughter, it's a slightly slouchy beanie with an interesting but easy stitch and it looks much better on my daughter than on my dummy - I'm still waiting for her to get her nose away from her phone thus creating an opportunity for her to model it for me - You know what pre-teens are like!

I hope to make a few of these for my shop when I get around to it. This shape is perfect for a teen or a young woman, I love it on my daughter but unfortunately it looks ridiculous on me, and so do berets as I found out when trying on what was supposed to become a winter beret for me that I had to quickly rip after one look in the mirror - oh the pain of getting older (or becoming a mature woman as I'd like to politely call it!).

Cade Cap modeled by my always available but not so good-looking dummy
 I decided to alter the Cade Cap pattern slightly to give it a more classic shape and this is when my own hat was born: my winter beanie is made using some of my birthday wool given to me by my sister: I also made a crochet cowl using the same colours and I may make myself a headband or a pair of mittens with what's left of these 2 colours. The wool is a limited edition by Drops and a dream to work with: so soft and squishy!

This one's mine: crocheted using my soft and squishy birthday wool
I like this crochet hat so much that I decided I'd make a few more in different colours for my Etsy shop, here is the first one, which I made slightly shorter than mine (I think mine is just a tad bit too long but I can live with it.

The first in my new line of crochet hats
The plan fornow is to work on a few Cade caps listings (I made another grey and an off white one last week), and hopefully manage to knit winter scarves to match these (I think I'll use my brioche stitch pattern in a longer version), and them make a few more beanie caps and matching crochet infinity scarves to match, if I can only try checking my timeline on Facebook a bit less (what was it I was saying about my daughter again?)

***Follow me on Twitter and Like Sophie's Knit Stuff on Facebook for more updates***

Sep 12, 2014

Knitted Scarves: Ready For Winter.

Over the past week I've been producing various items with my knitting needles and hooks.

My local knitting group has started up again in Galway so I get to talk to other grown ups about knitting (I think that I've managed to bore all my neighbours with my talk about knitting so they tend to leave me alone, oops...)

First off is this crochet bag cover which I spotted on a Facebook Knitting group during summer: this will be used to carry my projects to the knitting group mentioned above:


The Infinity scarf is finished and probably the longest I'll ever knit for a scarf. I used the brioche stitch as it's reversible, thick and lovely to hide in from the cold. I published a free knitting cowl pattern last year on Ravelry, this has more stitches as the wool is less bulky, and is much, much longer! I used a provisional cast on and used the kitchener or grafting method to stitch both sides together this time: it makes a cleaner join. A bit long for my taste but I know some people love their infinity scarves about 6 foot long in circumference. I need to take more photos to show off the size but you can see it here looped twice around the clothes hanger:


It's waiting to be listed in my shop (hopefully next week), and I've used some of the same wool for a crochet hat and some mittens. I'm not too sure about the mittens, as I never crocheted any before: I think one of them is tighter than the other so these won't be going in my shop:


I am also in the process of listing 2 new hand knit cabled tube cowls in my Etsy shop as I am writing this: these are made using 3 balls of Pure Merino so accordingly priced. I hate putting a high price on my knitting but if I matched the selling price with my time and materials, these would be over €100! The fact that they are shaped as a tube results as a double thickness which also means doubled time and amount of wool needed to knit them (and the wool wasn't cheap but oh so soft!):


I'll be back soon and show you some more work, as I've been busy making hats, working on a road trip scarf and a snood for me using some of the wool I got last June for my birthday.

***Follow me on Twitter and Like Sophie's Knit Stuff on Facebook for more updates***


Sep 2, 2014

Back To School, Time To Do Some Work

Here we are, September started and I must really, really, get to grips with the fact that I must stop blaming my kids for my not knitting enough items for my Etsy shop.

They are now both back in school and even though afternoons are touch and go for knitting: my eldest one started secondary school, so I have my youngest coming home at 2.30 pm, then there's the talking and snack eating, kitchen table cleaning and homework help (yesterday, she couldn't remember how to do long multiplication, and apparently they learn it slightly differently than I did, so my help may have resulted in even more confusion!). Then she's just settled and finally motivated to do her homework when the eldest one walks in and proceeds to making herself a snack: well at least she doesn't need to big a push before going upstairs to do her own homework (I had to insist on looking at her French homework yersterday, with me being French she will have no excuses for falling behind in this subject;), and then the time comes for preparing dinner, so I guess the 2.15pm to 8.00pm will have to be the time when I do things that don't need too much focus (Hello Facebook, Pinterest and Twitter).

The problem is that I still haven't learned out to stay off Facebook for long periods of time, so I need to steady on and work out a schedule (schedule? What's that? Didn't I used to have some kind of schedule which I didn't stick to and anyway I can't remember where it is?).

So, anyway, in the last few weeks since I last wrote a blog post, I finished the blanket for my daughter, knitted and published another knitting pattern for another pair of fingerless gloves, and I'm knitting an infinity scarf which I should finish today (yes, I know, it's not much, but the pattern publishing seems to take a lot out of me). Oh, and I sold a cowl yesterday (Yesssssss!)

I'm also in the process of trying to improve my shop photos and working on the SEO of all my existing shop items (or in plain English carefully choosing the right words to describe and tag my items in the hope they will be easier to find by online shoppers - do you know that if you enter "knitted scarf" today in Google, you get over 12 million results? Makes me tired just thinking about it!).

I guess it's time to get to work, so I will leave you with the pictures of my knitted and crocheted work:
The crochet blanket is a good hiding place;)

Another pair of merino gloves

Infinity scarf in progress

***Follow me on Twitter and Like Sophie's Knit Stuff on Facebook for more updates***

Aug 12, 2014

Getting Up To Speed

I've been working hard on publishing (at last!) my knitting pattern for the Chain Cable Fingerless Gloves. The knitting pattern is on Ravelry and Craftsy as well as Etsy.

It seems a bit pathetic to have it finished 2 months after I started working on this mitten pattern (you would think it was an intricate design sweater I was knitting), but I have my 3 week-long holiday as attenuating circumstances. Also, to make me feel less guilty of a 3 week holiday, I kept my hands and needles busy with my knitted summer top.

I knitted a lot of wrist warmers before being happy with the pattern, and even then I decided to knit three pairs of these mittens: one with a long wrist, one with a shorter wrist (to try and see if one ball of the merino wool I was using would be enough - it wasn't), and the last in another yarn (a wool / acrylic mix that worked well and only took one ball, even in the long wristed version).


I struggled with the thumb gusset and ended up with 2 pairs of knitted gloves that are not fit to be sold - I would have ripped them and reused the wool if I hadn't been such a dork weaving in the ends so securely - Ripping them may prove nearly as difficult as breaking out from Alcatraz but I'm not giving up on that yet, my priorities are elsewhere right now.

What am I working on now?

This is a crochet Corner to Corner (C2C) blanket I've started doing for my youngest daughter for 3 reasons:
1- She had bought a pack of 2 balls of that wool nearly a year ago and only used a small bit for making crochet chain bracelets; since she tends to get easily distracted and had no idea what else to do with it, she gave it to me as a late birthday gift.
2- She lost her crochet cushion on the ferry between Ireland and France (she just forgot she had brought it in the cabin and realised when it was too late to get it back that she had left it under her pillow - which is probably why we didn't spot it when we were packing our stuff before leaving the ferry). That crochet cushion had been made by her sister and she had paid her for it out of her hard earned pocket money. I could have made another one for her for free but she wanted it made by her sister, and her sister being tired of making crochet cushions, she wasn't willing, so I had to somehow find a way to make her forget her beloved yellow and red cushion.
3- I've wanted to try the C2C pattern for a while, and I thought that was a good opportunity (yes I know that's selfish of me, but you'll just have to forgive me for being human).

At the same time, I'm working on stocking my Etsy shop with more hand knit fingerless gloves and knitting patterns, so here is a preview of my current knitting WIP, which of course is about to be ripped as I made it a bit too small (I think I have knitting OCD):

***Follow me on Twitter and Like Sophie's Knit Stuff on Facebook for more updates***

Jul 30, 2014

Easing Slowly Back To Work

I've been back from my holiday since last Thursday and after spending a few days getting rid of the jungle my garden had become and cleaning up the house it's time to get back to doing a bit of work, so I'm on a "the kids are home and I don't have a clue what my work routine is but I'll try spending some time with them and doing some work anyway" kind of work schedule.

The first thing I'll share with you is the summer top I managed to finish knitting while at my parents' house. In the Drops pattern books my sister brought me for my birthday, I found this pattern that I thought would look great in my Tussah Silk yarn. I'd started making a crochet top without a pattern that wasn't going anywhere fast, so off I went ripping that top, and I used the yarn for my favourite kind of knitting pattern: the kind of top made in one piece on circular needles and without any sewing at all, not even sleeves!


While I was in France I visited the local yarn stores and look what I found in one of them:


I'll use the big pack of thinner blue wool to knit another pattern that I eyeballed, still in the Drops pattern books, but this time it will have sleeves as it will be for autumn/winter.

With the thick wool (I got 3 balls of each colour), I'll knit or crochet (or both:) some winter accessories for my Etsy shop.

I can't wait to get started on these but first I'm making some more of my cable mittens and trying to publish that knitting pattern I've been slaving on since June.

***Follow me on Twitter and Like Sophie's Knit Stuff on Facebook for more updates***

Jul 4, 2014

Cable Mittens Indecision

I probably don't deserve this as I have been more than slacking lately but the trip has been booked for the last few months and my parents need to see their granddaughters so here we go, heading on the Ferry to France tomorrow!

I thought I would have the pattern for my cabled mittens well published by now, but of course since I'm never happy with "just OK", I've been wasting time (hence the slacking I was referring to in the 1st paragraph) knitting up a few pairs of fingerless gloves trying to make them perfect... And perfect they would be, only for the amount of wool they are using, or perhaps for the yarn I chose to knit the mittens with.

At first I wanted to make some really stylish long wristed fingerless gloves with a chain cable running over the back of the hand: my first mistake was to start with an already opened ball of wool, so of course I needed a second ball to finish the second mitten, and I thought I might get both done with only one ball if I had started with a brand new ball of wool.
Long wristed cable mitten
So I knitted another pair of mittens in a different colour and starting with a new ball of the same brand of wool, this time trying to get the gusset to run over the whole thumb, unlike the first pair where the gusset only appears on the first 8 rows of the thumb, which doesn't look bad, but it could improved; the hand part is a little longer too. Of course I ran out of wool again towards the top of the second mitten. That and the fact that my decreases on the visible part of the thumb may look like a pattern feature, but actually do not look that good.
Long wristed mitten, funky looking thumb (not in a good way)
So I had to try another pair of mittens, making the wrist a little shorter with a long hand (maybe I should have made it a little shorter like for the first mitten?) but not too short so they still look stylish, and this time with a proper professional-looking gusset: this time I think my mittens look good, but guess what? One ball still wasn't enough, even though I only need a little extra. 

Medium wrist cable mitten (not as nice as the long wrist and still using too much of that wool!)

So am I going to ask pattern purchasers to buy 2 balls of wool (which I think is being discontinued anyway) when they'll hardly use any of their second ball for the pattern? I would hate to buy a pattern like this, so I don't think so!

I can still sell my mittens in my Etsy shop, but for the pattern, I'll have to knit up a pair of long wristed cable mittens in a wool with more yardage to get less waste (or 2 balls with less as long as it's an affordable one and very soft): and here goes to once again making changes to my cable mittens knitting pattern!

I'd like to get a second opinion so please let me know which one you prefer: long wrist/medium wrist? Long hand/short hand? (the wool is 100% merino and a dream to work with, a pity it's being discontinued).


 ***Follow me on Twitter and Like Sophie's Knit Stuff on Facebook for more updates***


Jun 27, 2014

People Make Etsy: Etsy UK TV Ad


Have you seen the Etsy ad on UK TV?

I'm hoping this will increase awareness on the great marketplace that is Etsy, where you can find beautiful handmade products made by people like you and me, with real people in mind.

Etsy was good enough to let sellers have their own personalized version of the ad, so here is mine, enjoy!


 ***Follow me on Twitter and Like Sophie's Knit Stuff on Facebook for more updates***


Jun 11, 2014

Etsy Shop Feature: Monofaces

In my last blog post I mentioned that I had been partnered with another Irish Etsy shop for the SEO course so today I wanted to write a little bit about Monofaces.

I was lucky to have such a nice shop to work with and a bit worried when having to do their critique because I didn't think my humble little knitting self had much advice to give a team of talented artists like Edita and Mel!

Quoting Monofaces About page: "Our mission is to give visual pleasure, original presents & striking interior detail. MONOFACES unique paintings range from legends of the past to people of today".

The paintings and apparel that can be found in Monofaces feature mainly people, you can see a lot of celebrities and legends of the past being represented in their art but they also do customised paintings using photographs: great idea for a gift or if you want a beautiful painting of your children to feature on your wall.

Monofaces's style can be described as Art-deco, Pop Art, and mainly black and white stencil monochrome art, they paint on various surfaces such as wood or canvas and have their art reproductions available for people on a tight budget. For wearables they also do tote bags, T-shirts, they have recently started doing phone cases and even rugs!

I've tried picking my favourite item from their shop but it's really hard to choose just one so here are a few of my favourite items from Monofaces:

First up is this beautiful painting of Audrey Hepburn on canvas:


Because I'm a child of the 80's (born in the 70's but too young to appreciate good music then;), I also love this painting of Morrissey on wood:


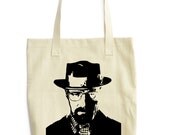
To finish, I think I would look very cool sporting this Walter White from Breaking Bad tote bag (for carrying my laundered money, erm...knitting WIPs, perhaps?):


 ***Follow me on Twitter and Like Sophie's Knit Stuff on Facebook for more updates***


May 30, 2014

Learning SEO and a Bit of Knitting and Crochet

It's been nearly 10 days since my last post: so much for the 2 posts a week I had been aiming for!

All this month I have been following an Etsy course on SEO (Search Engine Optimisation), which in plain English is the science of getting found on the Internet.

I've learned some new things and worked on some things I already knew but there is more structure learning from a course than trying to gather bits of information here and there, which doesn't always work, as it inevitably ends with information overload (and in some cases misinformation).

For this SEO course, I've been partnered with another Etsy seller based in Ireland: I think if I didn't have a partner I probably wouldn't bother with half of the things I'm supposed to do for the course, because I don't like to let anyone down, and I think whoever thinks up these Etsy courses knows that, which is why we are being teamed up. Ultimately, Etsy gains in helping their individual sellers, since we are their bread and butter.

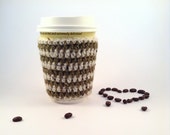
In between working on the SEO course, I have been crocheting 8 coffee cup cosies that would make great Father's day gifts and that are now available from Sophie's Knit Stuff on Etsy, drove myself half crazy trying to think of different keywords to describe them with as part of the SEO course, and trying to take better pictures (do you like my little coffee bean shapes?):


 I have also managed to knit a wonderfully soft blue cabled tube cowl and matching fingerless gloves with my Merino wool which should be ready for the shop next week as they are at the blocking stage and I'm taking the week end off:


 This weekend in Ireland is a long one, due to the June Bank holiday on Monday (don't ask me what that is for, I'm just glad it's there!), so whether you have a long or regular weekend, enjoy it and make the most of the sunshine if you're lucky enough to get some!


***Follow me on Twitter and Like Sophie's Knit Stuff on Facebook for more updates***

May 21, 2014

The Importance of Good Photography to Sell Products Online

Last week-end as I was listing some new phone cosies in my Etsy shop, I realised how one simple change could make my photos look much better.

Take this picture of one of my latest crochet phone cosy for example:

Phone cosy photo taken straight from above

Now look at the photo below:

Phone cosy photo taken from an angle


The lighting and background are similar (as white a background I can get using Picasa photo editor while keeping the color true to the original item), the item is the same, the only difference is the angle in which the photo has been taken.

Which one do you be more tempted to buy? I know if I was a potential buyer I wouldn't stay very long looking at the first picture.

I am still wondering how did I manage to sell 3 knitted phone cosies with pictures looking similar to the first photo, and the obvious thing I need to do now is do another photography session with all my other phone cosies before too many potential customers see the bad ones!


***Follow me on Twitter and Like Sophie's Knit Stuff on Facebook for more updates***


May 13, 2014

How To Crochet A Cushion And Make An Insert Using An Upcycled T-Shirt

Once again, I am doing some crochet for our local school: the crochet class is crocheting cushions that they will sell in a fundraising event next week in the school.

It all started with a bake sale: every year now for a while, the 6th class girls organize a bake sale in order to raise money for the school (don't get me started with why we need to help our schools on top of paying our taxes; I don't want to involve politics or I would need to start a whole new blog and make a lot of enemies in the process! I still want you to think I'm a nice person:)

As the girls' crochet skills have been improving, the teacher decided that they would make 2 cushions each: one to keep and one to sell at the Bake Sale (which should be now called the Bake and Craft Sale).

The teacher had a pattern for the crochet circles, but that pattern just didn't make sense to me, as the increases were not regular and I ended up with a volcano shape when I tried to follow the exact instructions, so I followed my daughter's advice (who does not read patterns and in this case it served her right!) and crocheted 2 basic treble crochet circles.

For the crochet circles, I used 2 colours of DK acrylic yarn, and crocheted flat circle shapes, 16 rounds for each. Here are some quick instructions for the beginners:

For each circle:
Chain 4 and slip stitch in the first chain to join in a circle.
Round 1: chain 3, work 11 trebles in the circle and join with a slip stitch to the top of the first chain 3. (12 sts)
Round 2: chain 3 (counts as 1 treble), 1 treble in the same stitch, work 2 trebles in each stitch and join with a slip stitch to the top of the first chain 3 while at the same time changing colour (if you are using just 2 colours, keep both balls attached to the circle, it will save you cutting and weaving in ends when finishing). (24 sts)
Round 3: chain 3, (counts as 1 treble), 1 treble in the same stitch, * 1 treble in next stitch, 2 trebles in following stitch * repeat from * up to the last stitch, 1 treble in the last stitch, join with a slip stitch to the top of the first chain 3 while at the same time changing colour.
Round 4: chain 3, (counts as 1 treble), 1 treble in the same stitch, * 1 treble in each of the next 2 stitches, 2 trebles in following stitch * repeat from * up to the last 2 stitches, 1 treble in each of the last 2 stitches, join with a slip stitch to the top of the first chain 3 while at the same time changing colour.
For every new round, you need to space the increases (2 trebles in the one stitch) by 1: for example for round 5, there are 3 stitches with 1 treble, then 2 trebles in the next stitch....
Continue in this way until you have reached the desired size (for a medium cushion using DK yarn I had 16 rounds, but you may want yours larger or smaller).

When you have both circles finished, all you need to do is join them: place them both together with wrong sides facing and using a colour in contrast with the last round, first chain 1, then double crochet (that's Single Crochet for people in the US) in both sides together about halfway before inserting the stuffing or cushion insert, then keep joining until you have the whole circles done and bind off.
Weave in the ends, and Voila! Cushion done and ready to ship to the Bake Sale (or cuddle with).

As it's the school children who are buying the goods, the cushions have to be affordable: I spent a good few hours myself crocheting my cushion, and I would be quicker than most of the girls in the class (I am ashamed to admit that my own 12 year old is quicker than me at crochet: she just whips it up with her skinny little fingers and it comes out perfect even though she hardly even looks at a pattern!). As I was saying, a lot of time and effort is going into crocheting these cushions but sadly, we need to compete with cheap mass-produced items if we want to attract buyers for them, so even though I'm not sure of the definite price yet, they will have to be cheap if the school wants to sell them.

In order to cut down on cost, I made my first cushion insert using an old clean T-shirt and some toy stuffing. I had the stuffing in the house so that's what I used but I won't have enough for the 2 cushions my daughter is making, so I washed an old pillow and will open it up to get the stuffing out of it and into her cushions.

Because the cushions are made using treble crochet (double crochet in US terms) which tends to give gaps in a finished item, I decided to cut up an old T-shirt, making an insert from the suffing and the upcycled T-shirt.

First I used some chalk to trace the outline of the cushion on my t-shirt, and then I cut it up: it looks a bit rough because I was trying to do this quickly, I should probably have ironed the T'shirt first:


Then I started sewing it about 3 quarters before starting to insert the stuffing inside. Even though my fabric cutting skills are atrocious and the 2 circles didn't match one another very well, adding to that the fact my hand sewing skills about the same as that of a 7 year old (I don't own a sewing machine, but judging from my home economics class in school, I wouldn't have done a great job either if I had one), I managed to get a nice round shape: a bit bumpy because the stuffing was quite compact, but nothing a bit of thumping can't correct!


As you can see from the above picture, the insert is far from being perfect, but watch what happened when I put it in between my 2 crochet circles:


Not bad for a first!

I will try making another one (I hope I won't have to tear out another pillow) and I'll also have to bake a few quick treats - There will be chocolate involved, but for now, I need to go and make a new cushion insert for my daughter's cushion before she comes back from school or I'll be in trouble!

This blog entry is my submission to the Deramores Blog Awards 2014. Deramores is the UK’s number one online retailer of knitting and crochet supplies.


May 9, 2014

My Failed Knitting Project

I was excited about an extremely soft bandana style scarf I was knitting last week end using James C Brett's Pure Merino Yarn. I had 1 ball in 5 different shades, plus 2 in Royal Blue. I wanted to knit the same scarf in all 6 different colours for my Etsy shop and I decided to use the blue first in case the scarf would use more than 1 ball (it did), and quickly ordered whatever I could get my hands on from the other colours I had, before this yarn would be completely gone out of stock from most places and impossible to reorder.

Yummy Soft Pure Merino from James C. Brett

I loved how soft the 100% merino wool felt and after a few trials, I was finally happy with its shape. Then I gently handwashed my royal blue scarf, my pride and joy: it felt loose and squishy in the water, and I was really careful not to stretch the fibre while washing it, squeezed the excess water in a dry towel and left it out on a flat surface in my hot press to dry yesterday.

Soft blue bandana scarf before washing and shaping

When I checked it this morning, to my shock and horror, my previously beautiful perfectly shaped triangle bandana scarf looked a bit wider than I remembered when I had been knitting it, but the length looked similar to what it was before. It was still as soft if not more than before washing, but the scarf had gone all floppy and didn't hold its shape when I tried it on.

After washing: unwearable floppy mess
This yarn really shows off imperfections: must apply myself more!

I could nearly kick myself for not knitting a sample square and washing it before going on to knit a scarf that needs a yarn that needs to be rigid, not a yarn that has drape like this beautiful merino yarn.

I think I learned my lesson: ALWAYS knit a sample and wash it before starting a knitting project! Unfortunately, a yarn you really love may not always be suitable for a knitting project that you really want to make. For some yarns it doesn't make a difference, but it's always better to be safe than sorry, so preparation might save you from disappointment.

I still want to make this bandana scarf come to life somehow, but I will have to find a more suitable yarn from my stash (I have a bulkier one with Merino but NOT 100% merino, so hopefully this one will do).

No point crying over wasted time: I have some ripping to do and a new project to think of using my Pure Merino because I have ordered so much of it (my first order arrived today:): I'm thinking cabled tube cowl, what do you think?

***Follow me on Twitter and Like Sophie's Knit Stuff on Facebook for more updates***


May 3, 2014

Free Crochet Heart Pattern

My daughter's class is studying the heart at school, and I know that the love heart shape is not very realistic, but it's cute, so I looked for a crochet heart pattern online.

I found a few crochet heart shape patterns, but they were always too small: for some reason it seems impossible to find a crochet heart bigger than 2 or 3 inches, so I had to put my overactive brain to work, and after a few trials, I came up with this:
Big Crochet Heart
I'm sure I'm not the only person who has been looking for one of these, so here is my Big Heart crochet pattern:

Notes:
I used some pink acrylic DK yarn and a 4mm (G) crochet hook ; it would look great in cotton too, and you can use thicker/finer yarn with a bigger/smaller crochet hook for different results.

I am using UK/Ireland crochet terms so if you are more familiar with the US crochet terms, here is a list of the terms and abbreviations used in this free heart crochet pattern:
ch = Chain (same for US and UK)
sl st = Slip stitch (same for US and UK)
dc: UK Double Crochet  = US Single Crochet
tr: UK Treble Crochet  = US Double Crochet
htr: UK Half Treble Crochet = US Half Double Crochet

Important:
  •  Insert a stitch marker into your starting chain at the beginning of each row. 
  • When counting your stitches, do not count the slip stitch at the end of the rows, or the starting chain at the beginning of the rows.

Instructions (in UK crochet terms):
ch4, join with sl stitch in the 1st ch to make a ring.
Round 1: ch1, 11 dc into the ring, join with sl st to beg. ch1 (11 sts).
Round 2: ch1, dc and htr in first st, 2 tr in each of the next 4 sts, 5 tr in the next st,  2 tr in each of the next 4 sts, htr and dc in last st, join with sl st to beg ch1 (25 sts).
Round 3: ch1, 1 dc in each of the first 2 sts, 1 dc and 1 htr in next st, 1 htr and 1 tr in next st, 2 tr in each of the next 3 sts, 1 tr in each of the next 5 sts, 5 tr in the next st, 1 tr in each of the next 5 sts, 2 tr in each of the next 3 sts, 1 tr and 1 htr in next st, 1 htr and 1 dc in next st, 1 dc in each of the last 2 sts, join with sl st to beg ch1 (39 sts).
Round 4: ch1, 1 dc in each of the first 2 sts, 1 dc and 1 htr in next st, 1 htr and 1 tr in next st, 2 tr in each of the next 3 sts, 1 tr in each of the next 12 sts, 5 tr in the next st, 1 tr in each of the next 12 sts, 2 tr in each of the next 3 sts, 1 tr and 1 htr in next st, 1 htr and 1 dc in next st, 1 dc in each of the last 2 sts, join with sl st to beg ch1 (53 sts).
Round 5: ch1, 1 dc in each of the first 2 sts, 1 htr in next st, 1 tr in each of the next 2 sts, 2 tr in each of the next 3 sts, 1 tr in each of the next 18 sts, 5 tr in next st, 1 tr in each of the next 18 sts, 2 tr in each of the next 3 sts, 1 tr in each of the next 2 sts, 1 htr in next st, 1 dc in each of the last 2 sts, join with sl st to beg ch1 (63 sts).
Row 6: 1 sl st in first st, 1 dc in each of the next 2 sts, 1 htr in next st, 1 tr in each of the next 3 sts, 2 tr in each of the next 3 sts, 1 tr in each of the next 21 sts, 5 tr in next st, 1 tr in each of the next 21 sts, 2 tr in each of the next 3 sts, 1 tr in each of the next 3 sts, 1 htr in next st, 1 dc in each of the next 2 sts, 1 sl st in last st, join with sl st to the back loop of the first sl st (73 sts).

Here is the link to the free Ravelry PDF download: Big Heart Crochet Pattern.

If you share this big heart shape crochet pattern, please include a link to my blog or my Ravelry Designer page!

***Follow me on Twitter and Like Sophie's Knit Stuff on Facebook for more updates***


Apr 29, 2014

Quick and Colourful Improvised Crochet Top

I am very impressed with how quickly I finished this super easy crochet top for my daughter: I started it on Saturday night, did a few hours on Sunday and Monday (not all day, as I was busy shopping, having to get my car's alternator fixed and cutting my lawn), and put it all together today.


This top was made for a child size 10 years and the colourful stripes (her choice) are each made of 2 rows of treble crochet (that's double crochet to US readers). I used some acrylic DK yarn: a bit less than half a 100g ball of each of the 3 colours so it was also cheap to make.

Being acrylic, it's not a top she'll be wearing on hot summer days, but we live in Ireland so that's fine. I would have used cotton yarn for a real summery top, but being broke, I did with what I had in the house.

I didn't waste time looking for a pattern. My daughter was wearing a cute top at the time with a simple shape: a front and a back piece with short sleeves as extensions of the top's shape, so I used that top as a template.

My daughter being the one who chose the colours and told me she wanted the same shape as the top she was wearing a the time, she also requested that I do 2 rows of treble crochet per stripe (first she asked me what was quicker and that was the quickest stitch I could use in making a crochet top so I think  she was just in a hurry to have it), and she demanded that I start with the pink stripe, then the white, then the yellow, I might as well say this top was designed by her (I'm just the maker).

I finished by adding a pink border made from 1 row of double crochet (Single crochet for our US friends) all around the neckline after sewing the top together). I was going to do the same for the sleeve edges, but it looked good enough without, and I was afraid this would make the sleeves too tight (not that my 9 year old has huge biceps, but I want her to have freedom of movement for those star jumps and cartwheels!)

With all the stripes, the yarn ends were a bit of a pain to sew in, but not a major issue.

And that's how you crochet a piece of clothing like a Boss!

***Follow me on Twitter and Like Sophie's Knit Stuff on Facebook for more updates***

Apr 26, 2014

Crochet Projects For The Family


This week I decided to use some of my yarn stash and practise my crochet skills to make myself a summer top: I am using some grey Sublime Tussah Silk DK for the bottom part and I have just finished the waist band in dark green Filati Da Collezione Star: it has got glittery silver in it, and I think it goes well with the shiny silk from the gray yarn:


I am also starting a top for my youngest daughter. The three of us were shopping for clothes on Wednesday and the eldest always gets more: I bought her little sister a cheap pair of jeans but most of her clothes get passed down to her from her big sister, so she can feel a bit left out sometimes.

So this afternoon I let her pick some of the DK acrylic yarn previously bought from Aldi, if I had had some bright cotton I would have used it but as we live in Ireland and summer never gets hot and doesn't last more than a fortnight (and that's if we're lucky!), acrylic will do. It will be also perfect in the autumn over a plain long sleeve T-shirt.

So she decided on fushia pink, white and yellow for her top. She may be only 9 but she knows what she wants and judging by some of the drawings she's been doing, she has an eye for fashion! She requested that I do it in treble crochet (that's double crochet if you're in the US): 2 rows of each colour between changes to be exact. It is going to have the same shape as the top she is currently wearing today, which I am going to have to steal tonight when she changes into her pyjamas in order to measure it properly (it's not easy to measure a slightly hyper happy child who likes to jump up and down all the time!).

I made the swatch as requested by her and measured the bottom part of her top just so I can make a start on it. It will be bright and wonderfully colourful, just like Emilie's happy personality:


I will now leave you with some crafty bits that Emilie wanted me to share on my blog: about 80 chain crochet bracelets, necklaces and rings made by herself using her own stash (yes I know!) and some of my leftover bits of yarn:


***Follow me on Twitter and Like Sophie's Knit Stuff on Facebook for more updates***

Apr 18, 2014

DIY Dummy Put To Some Good Use: Alpaca Lace Hearts Shawl And Knitting Pattern

Today is the day when I unveil my finished DIY dummy bust shape.

After I finished stuffing and covering Barbie twice with papier mache, I painted it all over with white poster paint. I used 2 coats but she could really have used 3.

I was very lucky with the nice sunny weather here at the beginning of the week, so I did all this outside, where I managed to dry the 2 coats of paint in one afternoon, while worriedly watching and hoping the wind wouldn't blow her out on the uncut grass.

After I brought the dummy home, I noticed the paint was looking a bit cracked, so I covered it with a thick coat of craft glue in order to seal everything in place.

So now I have one bumpy dummy bust, which I dressed using one of my summer tops, to hide all the bumps and not too even white colour.
It's not perfect but it will do for what I need: something that is not me to help me display knitted scarves, wraps, shawls...
It was a lot of time-consuming work, and I resent it a little for all the time I spent making it, dirtying my kitchen, and not letting me knit as much as I would have liked. 

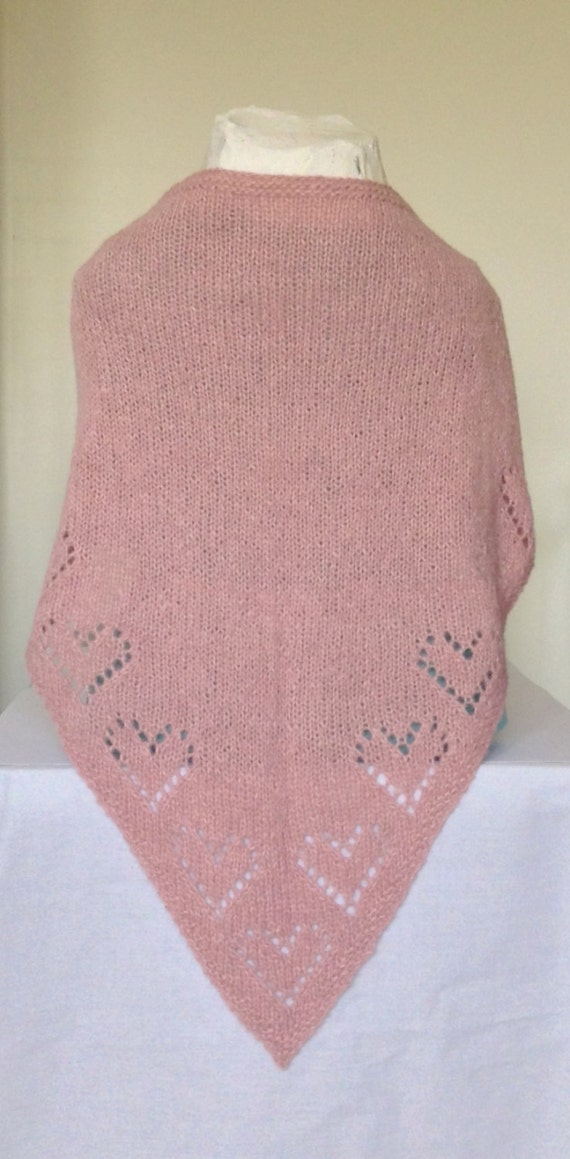
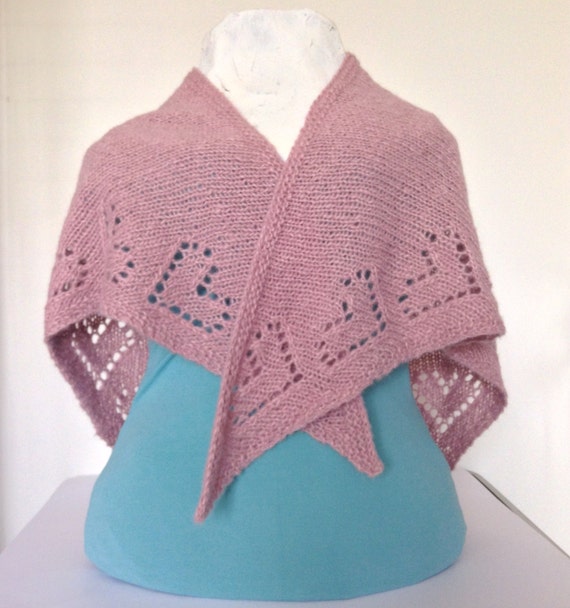
In the end, I am glad I have my display dummy now, and I have already put it to work to display my latest knit of art: the Alpaca Lace Hearts Shawl:

This shawl is available to buy now from my Etsy shop Sophie's Knit Stuff.


During all this week, I have also worked very hard on the shawl pattern, and I am proud to announce, that after even more time drawing charts on my computer, typing the corresponding instructions making sure there were no mistakes, translating the same instructions in French, and an awful lot of proofreading, the knitting pattern for my Alpaca Lace Hearts Shawl is now also available to buy from Etsy, Ravelry and Craftsy.


I am going to have a cup of coffee now, before I replenish my food supply and clean the house, and then hopefully I will be able to enjoy a nice long Easter week-end.

Happy Easter!

***Follow me on Twitter and Like Sophie's Knit Stuff on Facebook for more updates***