Showing posts with label crochet. Show all posts

Mar 7, 2015

Crochet Pattern Testing: Cute Bing Bunny Amiguri

A few weeks ago I was given the opportunity to be one of the testers for an amiguri crochet pattern, this was my first time testing a pattern for someone else and I must say this was an enjoyable experience.

I had never heard of Bing Bunny before, my daughters having passed the age for this type of cartoon, but when my 12 year old saw a picture of it online, guess what she said? "I want it!".

Luckily I had the same yarn in my stash that was recommended for the pattern (with some colours not exactly the same, but it doesn't really matter for an amiguri toy), so here is my result:


I made a mistake sewing one of the ear designs the wrong way and the mouth is a little crooked but these were my own errors, nothing to do with the amiguri pattern itself. I still think my Bing Bunny is pretty cute, if I say so myself;)

The Bing Bunny amiguri crochet pattern is now available to purchase from Peeko Crafts on Etsy and the designer is planning on publishing some more amiguri crochet patterns which is great news. I can only recommend the as it contains very clear and detailed instructions with links to photo tutorials. If you don't crochet, the finished items are also available to buy from the same shop (there is also a cute elephant amiguri and lots of other beautiful goodies in her Etsy shop).

It's back to work now for me, I'm working on a few sets of baby hats and bootees at the moment and then it will be time to take a little break from crochet and return to some knitting; I've also bought some cute fabric about a month ago to try and make my 10 year-old a tablet case but I'm a bit ashamed to say I haven't even started it yet as I was prioritising my crochet baby blankets and I work better when focusing on one thing at a time.

***Follow me on Twitter and Like Sophie's Knit Stuff on Facebook for more updates***


Feb 13, 2015

Gangsta Granny Dress Up Crochet Wig

My daughter's school always tries to promote reading and this year, as well as the traditional book fair where the primary school hall transforms into a bookshop, the principal has decided that the children could dress up as their favorite book character for the last day of the book fair, which is today.

My youngest daughter is far from being a bookworm (unlike her older sister), but there is one author that she really loves reading: David Walliams. I've hear that he is a very popular children's book author and I was curious to know what it is about his books that makes children love them so much, even those who don't particularly like to read*. I'm in the process of reading my second one (I know it's not my age bracket, but a book is a book, and I think it would be a shame not to read a book that's available to me as it's already in the house, plus, my daughter practically forced me to read it). I must say I've read worse (and within my own age bracket!) and these books are very funny and very imaginative. Here's what's on my night stand at the moment:

When I heard about the dress up day, I immediately thought of making a grey-haired wig with a bun attached and a bank robber's mask so the little one could dress up as David Walliams' "Gangsta Granny". I'm not great as designing crochet (knitting is more my thing) so I went searching on Pinterest and found exactly what I was looking for with the help of the Ninja Turtles!

I used Holyjeans' Crochet  Ninja Turtle Mask Hat Beanie pattern as a basis (it's free:-) but made a few changes such as the colors (grey hair and a black mask), I added a flat circle that I stuffed to make the bun shape, I decided to make 2 extensions on each side of the black mask to be able to tie is up and make it look more like a cartoon bank robber's, and as it was missing a little something to hide the back of the hair, I crocheted a little trapezoid shaped grey extension at the back. My daughter's hair is long so I had to tie it into a bun and hide it inside the hat, if you're wondering what the big lump is;)


After a rummage through our clothes, we picked a double layer of my tan tights (it's cold out you know!), an old flowery dress of mine I never wear (knee-high for me, perfect for a 10 year-old granny;-), a purple cardigan and here is our version of Gangsta Granny (we decided to skip the smell of cabbages!):

We decided on the runners because she might have PE today and I told her that grannies usually wear comfortable shoes, especially when they need to make a quick getaway on their granny scooters;-)

*While this is not a book review, I think I found David Walliams' tricks to drawing children to his books: one example of which includes a detailed set of instructions on how to pretend to brush your teeth, but don't worry, it also mentions that it's nearly as easy as brushing your teeth;-);-). I think all parents who take their parenting job seriously should read these books:-)

**I wish to apologise for the unusual high amount of smiley emoticons in this blog post, it's just that you can't read Grangsta Granny without having the odd fit of laughter; this book should be prescribed by doctors;-);-);-)

***Follow me on Twitter and Like Sophie's Knit Stuff on Facebook for more updates***


Jan 28, 2015

Crochet Baby Blankets Galore!

Time has passed so quickly again I just realised this is my first 2015 blog post so I wish all my readers (all 3 of them;) a belated Happy New Year!

Shortly before Christmas I tried working on a new knitted hat pattern that I think will never happen now: after having to pause my pattern designing so I could knit some cabled headbands and a custom crochet phone cosy for some Etsy orders, I realised knitting cables was putting pressure on my left hand and hurt my thumb so I took out my baby yarn and started making some crochet baby blankets instead.

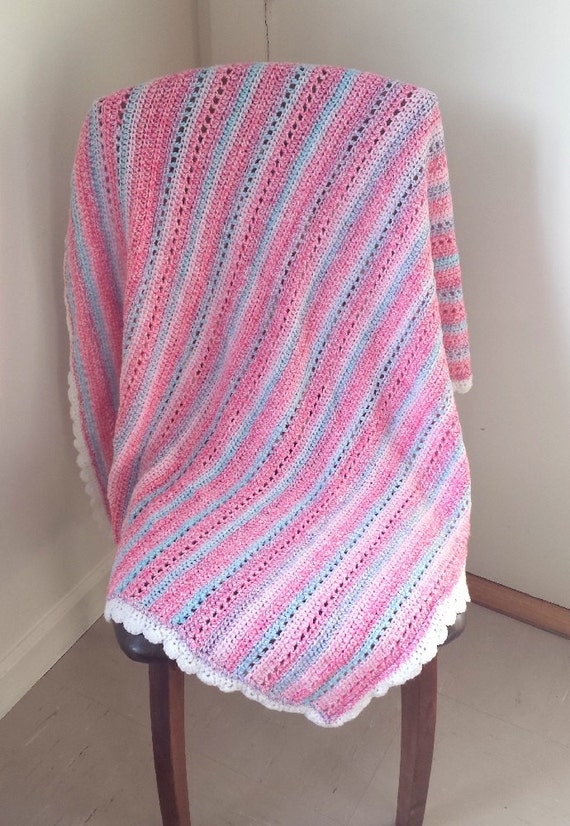
Since my hand was sore I was crocheting pretty slowly for a few weeks but some time in January I managed to finish my first baby blanket, listed yesterday in my Etsy shop:

Then I made another one, also listed yesterday: 


I have a lot more baby wool to go through, so I'm not sure I can be stopped until I run out. It is time-consuming, but I am enjoying the "no need to think" bit and the regular changes of stitch or colours mean that it never becomes monotonous: I've started doing this one while watching "Orange Is The New Black" on Netflix, only when my girls are at school, though, as it's a strictly over 18 show!

I'm not sure whether I'll just do a white border or pick a darker blue to spice up it up a little: I looked at the different shades of blue I have at home but none seems to be the right one (I know I can be very fussy, but I can't have anything less than perfect, can I?) so maybe I'll have an excuse to go to the yarn shop soon, but first I'll make a start on a pink one because I'll be faced with the same dilemma when I finish this too;)

So, lots more baby blankets to come in various colours (I think I need to borrow a Dulux colour wheel;), and lots of Netflix series to watch in the next few weeks for me!

***Follow me on Twitter and Like Sophie's Knit Stuff on Facebook for more updates***


Oct 4, 2014

A Bunch Of Crochet Beanie Hats

I've decided to try and knit or crochet at least 2 winter accessories per week between now and the end of November.

Crochet beanie hats are the quickest and apart from the 2 hats I've crocheted for myself and my daughter, here's one that I made earlier (sounds like a cooking show, doesn't it?):
Brown-Orangey beanie hat, plain and sweet for a casual everyday look

I used the Cade Cap crochet pattern from The Velvet Acorn to make a funky hipster hat for my daughter, it's a slightly slouchy beanie with an interesting but easy stitch and it looks much better on my daughter than on my dummy - I'm still waiting for her to get her nose away from her phone thus creating an opportunity for her to model it for me - You know what pre-teens are like!

I hope to make a few of these for my shop when I get around to it. This shape is perfect for a teen or a young woman, I love it on my daughter but unfortunately it looks ridiculous on me, and so do berets as I found out when trying on what was supposed to become a winter beret for me that I had to quickly rip after one look in the mirror - oh the pain of getting older (or becoming a mature woman as I'd like to politely call it!).

Cade Cap modeled by my always available but not so good-looking dummy
 I decided to alter the Cade Cap pattern slightly to give it a more classic shape and this is when my own hat was born: my winter beanie is made using some of my birthday wool given to me by my sister: I also made a crochet cowl using the same colours and I may make myself a headband or a pair of mittens with what's left of these 2 colours. The wool is a limited edition by Drops and a dream to work with: so soft and squishy!

This one's mine: crocheted using my soft and squishy birthday wool
I like this crochet hat so much that I decided I'd make a few more in different colours for my Etsy shop, here is the first one, which I made slightly shorter than mine (I think mine is just a tad bit too long but I can live with it.

The first in my new line of crochet hats
The plan fornow is to work on a few Cade caps listings (I made another grey and an off white one last week), and hopefully manage to knit winter scarves to match these (I think I'll use my brioche stitch pattern in a longer version), and them make a few more beanie caps and matching crochet infinity scarves to match, if I can only try checking my timeline on Facebook a bit less (what was it I was saying about my daughter again?)

***Follow me on Twitter and Like Sophie's Knit Stuff on Facebook for more updates***

May 13, 2014

How To Crochet A Cushion And Make An Insert Using An Upcycled T-Shirt

Once again, I am doing some crochet for our local school: the crochet class is crocheting cushions that they will sell in a fundraising event next week in the school.

It all started with a bake sale: every year now for a while, the 6th class girls organize a bake sale in order to raise money for the school (don't get me started with why we need to help our schools on top of paying our taxes; I don't want to involve politics or I would need to start a whole new blog and make a lot of enemies in the process! I still want you to think I'm a nice person:)

As the girls' crochet skills have been improving, the teacher decided that they would make 2 cushions each: one to keep and one to sell at the Bake Sale (which should be now called the Bake and Craft Sale).

The teacher had a pattern for the crochet circles, but that pattern just didn't make sense to me, as the increases were not regular and I ended up with a volcano shape when I tried to follow the exact instructions, so I followed my daughter's advice (who does not read patterns and in this case it served her right!) and crocheted 2 basic treble crochet circles.

For the crochet circles, I used 2 colours of DK acrylic yarn, and crocheted flat circle shapes, 16 rounds for each. Here are some quick instructions for the beginners:

For each circle:
Chain 4 and slip stitch in the first chain to join in a circle.
Round 1: chain 3, work 11 trebles in the circle and join with a slip stitch to the top of the first chain 3. (12 sts)
Round 2: chain 3 (counts as 1 treble), 1 treble in the same stitch, work 2 trebles in each stitch and join with a slip stitch to the top of the first chain 3 while at the same time changing colour (if you are using just 2 colours, keep both balls attached to the circle, it will save you cutting and weaving in ends when finishing). (24 sts)
Round 3: chain 3, (counts as 1 treble), 1 treble in the same stitch, * 1 treble in next stitch, 2 trebles in following stitch * repeat from * up to the last stitch, 1 treble in the last stitch, join with a slip stitch to the top of the first chain 3 while at the same time changing colour.
Round 4: chain 3, (counts as 1 treble), 1 treble in the same stitch, * 1 treble in each of the next 2 stitches, 2 trebles in following stitch * repeat from * up to the last 2 stitches, 1 treble in each of the last 2 stitches, join with a slip stitch to the top of the first chain 3 while at the same time changing colour.
For every new round, you need to space the increases (2 trebles in the one stitch) by 1: for example for round 5, there are 3 stitches with 1 treble, then 2 trebles in the next stitch....
Continue in this way until you have reached the desired size (for a medium cushion using DK yarn I had 16 rounds, but you may want yours larger or smaller).

When you have both circles finished, all you need to do is join them: place them both together with wrong sides facing and using a colour in contrast with the last round, first chain 1, then double crochet (that's Single Crochet for people in the US) in both sides together about halfway before inserting the stuffing or cushion insert, then keep joining until you have the whole circles done and bind off.
Weave in the ends, and Voila! Cushion done and ready to ship to the Bake Sale (or cuddle with).

As it's the school children who are buying the goods, the cushions have to be affordable: I spent a good few hours myself crocheting my cushion, and I would be quicker than most of the girls in the class (I am ashamed to admit that my own 12 year old is quicker than me at crochet: she just whips it up with her skinny little fingers and it comes out perfect even though she hardly even looks at a pattern!). As I was saying, a lot of time and effort is going into crocheting these cushions but sadly, we need to compete with cheap mass-produced items if we want to attract buyers for them, so even though I'm not sure of the definite price yet, they will have to be cheap if the school wants to sell them.

In order to cut down on cost, I made my first cushion insert using an old clean T-shirt and some toy stuffing. I had the stuffing in the house so that's what I used but I won't have enough for the 2 cushions my daughter is making, so I washed an old pillow and will open it up to get the stuffing out of it and into her cushions.

Because the cushions are made using treble crochet (double crochet in US terms) which tends to give gaps in a finished item, I decided to cut up an old T-shirt, making an insert from the suffing and the upcycled T-shirt.

First I used some chalk to trace the outline of the cushion on my t-shirt, and then I cut it up: it looks a bit rough because I was trying to do this quickly, I should probably have ironed the T'shirt first:


Then I started sewing it about 3 quarters before starting to insert the stuffing inside. Even though my fabric cutting skills are atrocious and the 2 circles didn't match one another very well, adding to that the fact my hand sewing skills about the same as that of a 7 year old (I don't own a sewing machine, but judging from my home economics class in school, I wouldn't have done a great job either if I had one), I managed to get a nice round shape: a bit bumpy because the stuffing was quite compact, but nothing a bit of thumping can't correct!


As you can see from the above picture, the insert is far from being perfect, but watch what happened when I put it in between my 2 crochet circles:


Not bad for a first!

I will try making another one (I hope I won't have to tear out another pillow) and I'll also have to bake a few quick treats - There will be chocolate involved, but for now, I need to go and make a new cushion insert for my daughter's cushion before she comes back from school or I'll be in trouble!

This blog entry is my submission to the Deramores Blog Awards 2014. Deramores is the UK’s number one online retailer of knitting and crochet supplies.


May 3, 2014

Free Crochet Heart Pattern

My daughter's class is studying the heart at school, and I know that the love heart shape is not very realistic, but it's cute, so I looked for a crochet heart pattern online.

I found a few crochet heart shape patterns, but they were always too small: for some reason it seems impossible to find a crochet heart bigger than 2 or 3 inches, so I had to put my overactive brain to work, and after a few trials, I came up with this:
Big Crochet Heart
I'm sure I'm not the only person who has been looking for one of these, so here is my Big Heart crochet pattern:

Notes:
I used some pink acrylic DK yarn and a 4mm (G) crochet hook ; it would look great in cotton too, and you can use thicker/finer yarn with a bigger/smaller crochet hook for different results.

I am using UK/Ireland crochet terms so if you are more familiar with the US crochet terms, here is a list of the terms and abbreviations used in this free heart crochet pattern:
ch = Chain (same for US and UK)
sl st = Slip stitch (same for US and UK)
dc: UK Double Crochet  = US Single Crochet
tr: UK Treble Crochet  = US Double Crochet
htr: UK Half Treble Crochet = US Half Double Crochet

Important:
  •  Insert a stitch marker into your starting chain at the beginning of each row. 
  • When counting your stitches, do not count the slip stitch at the end of the rows, or the starting chain at the beginning of the rows.

Instructions (in UK crochet terms):
ch4, join with sl stitch in the 1st ch to make a ring.
Round 1: ch1, 11 dc into the ring, join with sl st to beg. ch1 (11 sts).
Round 2: ch1, dc and htr in first st, 2 tr in each of the next 4 sts, 5 tr in the next st,  2 tr in each of the next 4 sts, htr and dc in last st, join with sl st to beg ch1 (25 sts).
Round 3: ch1, 1 dc in each of the first 2 sts, 1 dc and 1 htr in next st, 1 htr and 1 tr in next st, 2 tr in each of the next 3 sts, 1 tr in each of the next 5 sts, 5 tr in the next st, 1 tr in each of the next 5 sts, 2 tr in each of the next 3 sts, 1 tr and 1 htr in next st, 1 htr and 1 dc in next st, 1 dc in each of the last 2 sts, join with sl st to beg ch1 (39 sts).
Round 4: ch1, 1 dc in each of the first 2 sts, 1 dc and 1 htr in next st, 1 htr and 1 tr in next st, 2 tr in each of the next 3 sts, 1 tr in each of the next 12 sts, 5 tr in the next st, 1 tr in each of the next 12 sts, 2 tr in each of the next 3 sts, 1 tr and 1 htr in next st, 1 htr and 1 dc in next st, 1 dc in each of the last 2 sts, join with sl st to beg ch1 (53 sts).
Round 5: ch1, 1 dc in each of the first 2 sts, 1 htr in next st, 1 tr in each of the next 2 sts, 2 tr in each of the next 3 sts, 1 tr in each of the next 18 sts, 5 tr in next st, 1 tr in each of the next 18 sts, 2 tr in each of the next 3 sts, 1 tr in each of the next 2 sts, 1 htr in next st, 1 dc in each of the last 2 sts, join with sl st to beg ch1 (63 sts).
Row 6: 1 sl st in first st, 1 dc in each of the next 2 sts, 1 htr in next st, 1 tr in each of the next 3 sts, 2 tr in each of the next 3 sts, 1 tr in each of the next 21 sts, 5 tr in next st, 1 tr in each of the next 21 sts, 2 tr in each of the next 3 sts, 1 tr in each of the next 3 sts, 1 htr in next st, 1 dc in each of the next 2 sts, 1 sl st in last st, join with sl st to the back loop of the first sl st (73 sts).

Here is the link to the free Ravelry PDF download: Big Heart Crochet Pattern.

If you share this big heart shape crochet pattern, please include a link to my blog or my Ravelry Designer page!

***Follow me on Twitter and Like Sophie's Knit Stuff on Facebook for more updates***


Apr 26, 2014

Crochet Projects For The Family


This week I decided to use some of my yarn stash and practise my crochet skills to make myself a summer top: I am using some grey Sublime Tussah Silk DK for the bottom part and I have just finished the waist band in dark green Filati Da Collezione Star: it has got glittery silver in it, and I think it goes well with the shiny silk from the gray yarn:


I am also starting a top for my youngest daughter. The three of us were shopping for clothes on Wednesday and the eldest always gets more: I bought her little sister a cheap pair of jeans but most of her clothes get passed down to her from her big sister, so she can feel a bit left out sometimes.

So this afternoon I let her pick some of the DK acrylic yarn previously bought from Aldi, if I had had some bright cotton I would have used it but as we live in Ireland and summer never gets hot and doesn't last more than a fortnight (and that's if we're lucky!), acrylic will do. It will be also perfect in the autumn over a plain long sleeve T-shirt.

So she decided on fushia pink, white and yellow for her top. She may be only 9 but she knows what she wants and judging by some of the drawings she's been doing, she has an eye for fashion! She requested that I do it in treble crochet (that's double crochet if you're in the US): 2 rows of each colour between changes to be exact. It is going to have the same shape as the top she is currently wearing today, which I am going to have to steal tonight when she changes into her pyjamas in order to measure it properly (it's not easy to measure a slightly hyper happy child who likes to jump up and down all the time!).

I made the swatch as requested by her and measured the bottom part of her top just so I can make a start on it. It will be bright and wonderfully colourful, just like Emilie's happy personality:


I will now leave you with some crafty bits that Emilie wanted me to share on my blog: about 80 chain crochet bracelets, necklaces and rings made by herself using her own stash (yes I know!) and some of my leftover bits of yarn:


***Follow me on Twitter and Like Sophie's Knit Stuff on Facebook for more updates***

Apr 7, 2014

Free Crochet Easter Egg Pattern For Beginners

Last Friday while at school for the weekly crochet session where I try helping out (I say try because sometimes there's more giggles than actual crocheting:-), the teacher was looking for ideas of something simple the kids could work on during the week.

Because it's nearly Easter the obvious and easiest thing I could think of was a crocheted Easter Egg so I said I would try and come up with an easy Easter Egg crochet pattern.

Some of the girls in the class are still struggling with their crochet (I guess I'm not that much help then!), so I could have designed an egg to work in the round, but I thought it might be easier to work 2 flat pieces and sew them both together after stuffing them with cotton wool or other stuffing material.

I did my homework and came up with this:

Crochet Easter Eggs

I made the turquoise egg on Friday, typed the pattern on Saturday and my daughter tested the pattern by making the red and pink eggs on Sunday morning: she found them so quick and easy she made one more last evening and cast on a 4th one this morning, to work on in her spare time in school.

I also made a crochet basket to put all our eggs in, but I finished it last night and my daughter took it to school this morning before I got the chance to take a picture:-(

Since I am sharing the pattern with the school, I thought I might also share it with my blog readers.

If you are a beginner the instructions are very easy to follow because I tried making sure it would be easy for 12 year-olds (the average class age), there is even a chart included to make it even easier: my daughter can vouch for it!

You can download the PDF for free from my Ravelry store. Here is the direct link: Easy Crochet Easter Egg for Beginners.

I apologise to my French countrymen and countrywomen as the pattern is in English only because I am not familiar with French crochet terms (I learned crochet recently and have been living in Ireland for about 20 years), but the chart should make it easy enough to understand as long as you know how to increase and decrease in double crochet.

***Follow me on Twitter and Like Sophie's Knit Stuff on Facebook for more updates***


Mar 7, 2014

My Daughter's Giant Granny Square

For the last few weeks my daughter's class has been learning crochet and even though my daughter already had basic crochet skills before starting, she had never made a granny square.

The lesson last Friday was granny squares, and it seems a certain 12 year old in our house is getting addicted to granny squares. Here is what she has been making since last Friday:

Ganny Square Blanket by my daughter

 She has got me to drive all the way to Knitwits and Crafty Stitchers on Monday to get her 2 new balls of each color (she's using King Cole's brightest dolly mix colors). I'm not sure how big she wants this blanket to be but I have a feeling she doesn't want to stop and will soon start yarn bombing our house!

I had never made a granny square before either so she made me try one and here's my first attempt:
My first (wonky) granny square
I know it's a bit wonky and I must admit there is now a bit of healthy competition between both of us (she won this round), but this was at the end of a long day and I was rushing to make this granny square before bedtime.

Granny squares are a lot simpler than they look and I can understand how one would get addicted to making granny square blankets.

That's it for today, I have a lot more knitting and crochet things to share but these are going to have to wait as my afternoon will be taken over by a certain 12 year-old birthday party.

***Follow me on Twitter and Like Sophie's Knit Stuff on Facebook for more updates***

Feb 19, 2014

Who Said Crochet Was Faster Than Knitting?

I think I have to disagree with what I'm hearing from most people, including my own daughter, who I now call "The crochet Ninja". I wouldn't mind being called a Knitting Ninja, if there was such a thing, and if I knitted fast enough to earn me that title.

More and more knitting and crochet projects are being added to my list of things to craft, and while I struggle to try and add more hand knit items to my Etsy store, most of the things I'm adding to my list are things I won't get paid for.

At the moment that list is in my mind, and hopefully one day before the middle of next month I'll have most of these done:
- Knit some daffodils for Irish Cancer Society (deadline mid-March)
- Crochet/knit some hats for Hats for Heroes for children with cancer, (no particular deadline but not to be put on the long finger as I usually do),
- Knit a Katniss Cowl for my daughter's birthday (deadline 11th March),
- Crochet treat bags for same daughter's birthday (deadline 11th March),
- Knit/Crochet some green headbands and Shamrock badges for St Patrick's Day (deadline fast approaching)
- Finish knitting my cardigan for which I have now finished the sleeves and realized I have to rip the top half of the back a second time, as my re-knitting wasn't following the right chart (there's always next winter!)
- *Finish crocheting the hat I started for my daughter:

2 evenings of crocheting a hat (Who said crochet was faster than knitting?)


* She doesn't need a new hat, but as she was hovering me while I was looking for crochet patterns on Ravelry, she saw the TweetHeart pattern I found and ordered me to make one for her, which I thought may be good practice for the charity hats I plan on making.

When I have all of the above done, I will still have to write and publish a few knitting patterns and hopefully I'll have time to think of new lovely knitted (and maybe crochet too;-) things to add to my Etsy shop.

In an ideal world, I would manage to finish most of these things on time, but unfortunately we don't live in that ideal world and I'm spending far too much time on Facebook, which is probably the main reason why the hat I started crocheting 3 days ago is far from being finished, and given the fact that I have to head into town, I don't think I'll be finishing it today either, unless I magically transform into a Crochet Ninja.

***Follow me on Twitter and Like Sophie's Knit Stuff on Facebook for more updates***


Oct 12, 2013

Saturday Etsy Share: Knit Halloween Goodies

I've decided to share some of the great stuff that's available on Etsy, so since Halloween is fast approaching, I am starting with Halloween items.

This week I have been looking at knit and crochet items. Of course there's a lot more than handknit and crochet on Etsy, but I had to start somewhere so why not with my favourite craft?

The first items are from members of the Etsy Ireland Team.

Here's Crow Cottage Crafts' Harry the Halloween Hamster


Next, check out these Victorian Vampire Mittens from Koticzka


Halloween Handknitted Art Scarf with cats, bats and witches from Purls of Colour


Olga Soleil has some Crazy Crochet Halloween Coasters


And a few more from non-Irish Etsy sellers:


There are a lot more cute and spooky Halloween items on Etsy, and I could spend hours looking at these, unfortunately I can't share them all here, so if you want to see more, head on to Etsy.

If you've enjoyed these, you can subscribe to my RSS, Like my Facebook Page or follow me on Twitter.


Jul 23, 2013

Learning How to Knit or Crochet

I am proud to say that I taught my daughters how to knit, and the best thing is that they have and are still showing a keen interest in this craft, which was passed on to me by my mother, and her mother-in-law to her - for some reason, she didn't pick it up when her own own mother tried to teach her, so I'm glad my paternal grandmother was an excellent knitter.

The method I've always used is English knitting, where you hold the yarn with the right hand (I am left handed, but this comes from being taught by a rightie).

A few weeks ago I discovered that my eldest daughter seems to be using the Continental style, in which you use the left hand to hold the yarn, so when I asked her how she learned this, she told me her school teacher showed her. I felt slightly betrayed, but I'm over it now (I think;)

For the last part of the school year, the teacher has been inviting the local knitting group once a week to teach the class how to knit, which was a good thing, since this may result in some of the pupils teaching their parents how to knit!

I have never been into crochet and my own attempts resulted in miserable failures (I can barely manage a chain), but my daughter's best friend taught her a bit of crochet, which my daughter passed on to her younger sister, and from what I'm hearing (they are both staying at my parents' house for a few weeks), my youngest daughter has been teaching my mother the little bit of crochet she knows.

I just find it great that it's not always the auld ones that can teach young people new skills, and that it can work both ways.


What about you? I am interested in knowing how you learned, and if you haven't, what is stopping you? Please your comments below!

P.S. If you want to learn skills like knitting, I have included a tutorials page in this blog, which I am planning on adding to, and there are lots of free video tutorials on YouTube if you want some more.